Heed these simple instructions to keep your saw in working order
By Charles Hand, with Rolf Beuttenmuller
This may be hard to believe, but in over 15 years of scrolling, I have never replaced a clamp or thumb screw. I’ve been able to keep my various machines—my oldest saw is a 1998 model—running like new by following a simple maintenance routine. I’ve laid it out here, as well as a few tips I’ve picked up along the way. Taking care of your scroll saw doesn’t have to be daunting, but it should be an investment you take seriously. Not only will your saw thank you for it, but your wallet will, too! After learning about saw maintenance, turn on your scroll saw and try making these butterfly fretwork pieces.
Safety Tips for ScrollingPrepare your workspace so that your scrolling experience is safe and enjoyable. Work in a well-ventilated space and surround your setup with good, even lighting. Always wear a dust mask and safety goggles, tie up long hair, and secure loose clothing before beginning a project in your shop. Employ a benchtop dust collector to help keep your work area clean and protect your lungs to ensure that you can scroll without difficulty for years to come. It is also important to read your tool’s instruction manual, and follow the recommended guidelines for proper setup and maintenance. |
Routine MaintenanceDon’t just walk away after you’ve finished scrolling. Clean up after each session. Vacuum up sawdust on and around the machine and blow out the clamps. Release the blade tension when the saw is not in use. Sand down any burrs or sharp metal edges on the table, and then lubricate it with WD-40® (Rolf prefers high-quality, furniture-grade paste wax). This will make workpieces slide more easily on the table and help to prevent the machine from rusting. Store spare blades and drill bits in their proper place. Remember that the best offense is a good defense. A clean, organized work environment will also reduce the chance for personal injury or possible damage to your saw from neglect. |
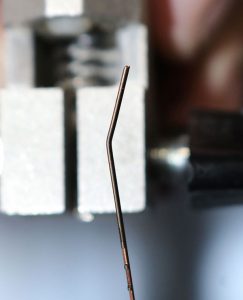
Proper Blade TensionEvery saw has a different method to tension, but it all comes down to finding the right tightness for your chosen blade (see Blade Selection below). When inserting a blade, clamp it to the upper and lower armatures. Once it’s tight, set the tension with the change knob. (Some saws have multiple lever positions. Always make sure that your tensioning lever is correctly positioned before turning on the saw.) If the blade is too tight and pressed too hard when sawing, it will break. However, if the blade is too loose and catches the wood, it’s also likely to break. Some scrollers test the tension by plucking the blade with a fingernail. An appropriately tensioned blade will sound like a high C note.
|
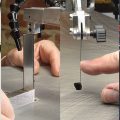
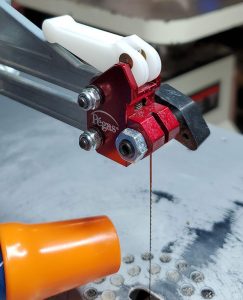 Incorrect tension 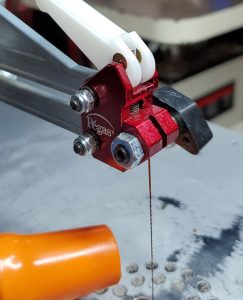 Correct tension. |
Blade SelectionChoosing the right blade can significantly increase a project’s likelihood of success. The thickness of the wood will affect the type of blade you’ll need. When cutting thicker wood, you want a blade with fewer teeth per inch (TPI). The opposite will be true with thinner wood. As a rule of thumb, you want to have at least four teeth in the wood at any given moment. This is because if you have too many teeth, the sawdust has no way of clearing out, which causes the blade to heat up and the wood to burn. Having too many teeth in the wood will cause the teeth to catch onto the wood, causing the user to lose control of the scrolled piece. |
Troubleshooting: Common Saw ProblemsThe Problem: The clamps won’t hold the blade. The Fix: Most scrollers tend to overtighten the clamps and, if a blade slips, tighten the clamps even more. On popular scroll saws, over-tensioning the clamp screw will spread the jaws to a point where they must be replaced. Generally, using just an index finger and thumb is enough to sufficiently tighten the thumb screw against the blade. Too much blade tension can also cause the blade to slip or break prematurely. |
| TIP
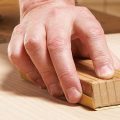
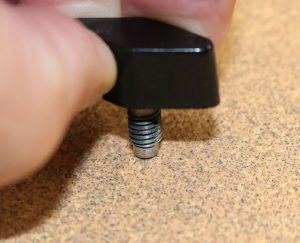
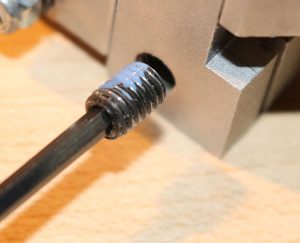
Clamp Screw Maintenance Remove the thumb screw. Gently rub the end back and forth a few times over medium-to-coarse sandpaper. Reinstall the thumb screw back into the clamp. Insert the blade and start cutting. If the blade continues to slip, repeat the process. You may need to repeat the process for both top and bottom clamps. If the blade still slips, check the clamp for spreading on the metal head. If this is damaged, the method will not work, and the clamp assembly will need to be replaced. |
 |
|
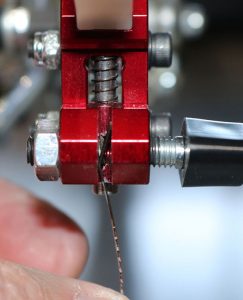
The Problem: My blade keeps bending. The Fix: A bent blade—or, as I call it, the hockey stick effect—is normally caused by the set screw sitting too deeply in the clamp body and, therefore, not touching the blade. Repositioning the set screw and clamp screw so they fall at the exact middle of the clamp will eliminate this problem. If the set screw is not positioned properly to hold the blade against the clamp screw, the blade will bend and most likely slip out of the clamp. |
  |
|
The Problem: My saw won’t start. The Fix: Saws are notorious for collecting sawdust in the power switch which causes them to not turn on. Blow the switches out with a can of compressed air. If that doesn’t work, try plugging the machine into a different outlet. Check to see if the fuse has blown. If the fuse blows a second time, the saw should be serviced. |
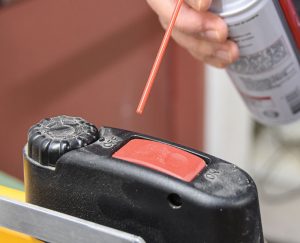
Use a can of compressed air to clear dust out of the switch. |
|
The Problem: My saw runs rough and/or knocks. The Fix: It is important to secure your saw firmly in place. Screw it down to a bench or mount it on a stand. If there is still too much vibration, the culprit is often wear in the arm pivots, rather than incorrect blade tension. Take the blade out, and then see how easily the arm moves left to right. If there is a lot of blade movement, check your manual. Failing that, ask your supplier whether there is a way to adjust this or if a part must be replaced. |
| TIP
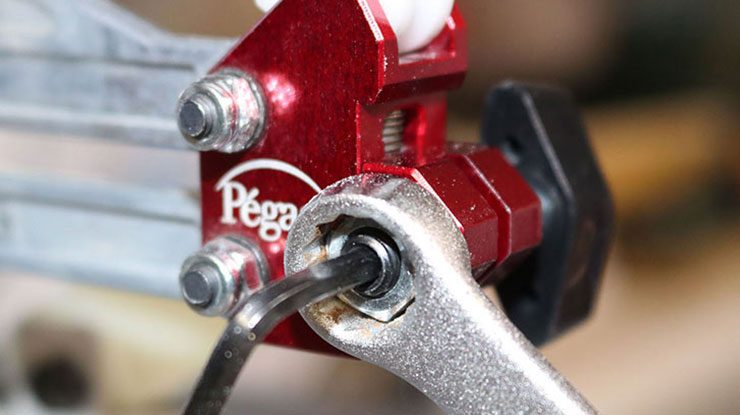
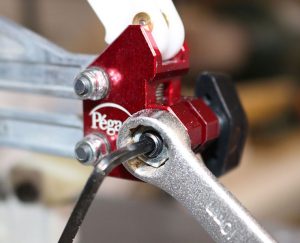
Adjusting the Set Screw Use a 3/8” (10mm) wrench to loosen the set screw nut. Then use an Allen key to adjust the set screw to a desired length. Retighten the nut to hold the set screw in place. |
 |
|
The Problem: My set screw is always loose. The Fix: A dab of Loctite® Blue works well to hold a set screw in place, yet still allow you to adjust or remove it, if needed. Note: Do not use Loctite Red for this application, as it will permanently hold the screw in place. Many have had success securing a set screw by using a dab of nail polish, wood glue, or a drop of lacquer. Experiment to see what best works for you, but do not use anything with a permanent hold. |
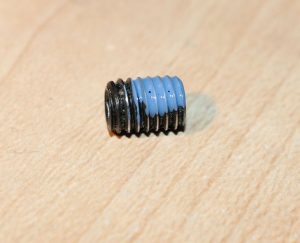
A small dab of Loctite Blue will seat the set screw securely.
|
|
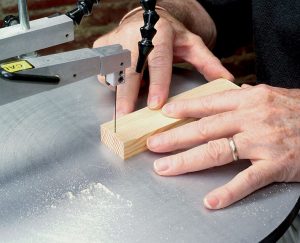
The Problem: I don’t know how to square the table. The Fix: Most scroll saws have an adjustable table that allows you to make cuts at different angles. There are times when you want your saw set at an angle, but most cutting is done with the blade perpendicular to the table. If the table is even slightly off-square, your cuts will be angled. This interferes with puzzle pieces, intarsia, segmentation, and many other scrolling projects. The most common method for squaring your table is the small square method. Set the square flat on the saw table against a blade that has been inserted and tensioned. Adjust the table to form a 90° angle to the blade. The cutting-through method is also popular. Saw through a piece of scrap wood at least 3/4″ (1.9cm) thick, and then check the angle of the cut using a square. Adjust the table until you get a perfectly square cut. You can also use the kerf-test method. Take a 1 3/4″ (4.4cm)-thick piece of scrap and cut about 1⁄16″ (2mm) into it. Stop the saw, and then spin the wood around to the back of the blade. If the blade slips easily into the kerf (the groove you just cut), the table is square. If it doesn’t slide into the kerf, adjust the table and perform the test again until the blade slips. |
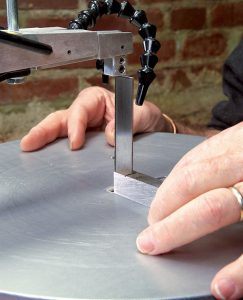
Small square method.
Cutting-through method. |
Monitor Your MachineKeep track of the hours that you put on your saw. Some saws require certain maintenance after a certain number of hours. For example, the Hawk® G426 calls for fresh application of WD-40® every 50 hours of use; the Hegner calls for lubrication every 10 hours. Check your saw’s manual for where to apply. If you are upgrading to a new saw, do not assume it will work like your old one. They all cut differently. Get to know your saw and listen to it. If it starts making new noises—stop and investigate. Sometimes the problem will be simple enough to fix on your own; other times, you’ll need to have the machine serviced. Remember, the scroll saw is the star of your arsenal, and it deserves the star treatment! If a part isn’t working perfectly, there’s usually a simple solution—but small, regular maintenance tasks help keep those instances few and far between. |
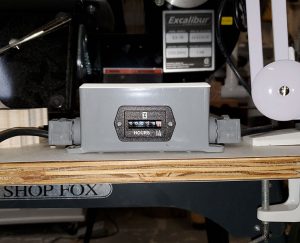
An aftermarket hour meter will measure the usage of your saw.
|
| About the Authors |
|
Charles Hand is retired from a career in electrical/mechanical design, graphic arts, and senior project management. He enjoys intarsia, fretwork, segmentation, inlay, and just about everything there is to cut with a scroll saw. Charles has won best of show and several other awards for his work and designs at local craft and woodworking shows. For more information and a tutorial on Charles’ pattern application method and framing technique, or for more of his patterns, visit scrollsawart4u.weebly.com. Rolf Beuttenmuller started scrolling in 2004 after his wife, June, bought him a scroll saw for his birthday. He joined a local club and enjoys new and challenging projects. His motto is, “I don’t know that I can’t, therefore I can.” Rolf retired from Brookhaven National Lab after 34 years of designing and building special devices for high energy and photon science research. He lives in Bellport, N.Y. |