With these helpful tips and tricks, there’s no need to fret when scrolling a delicate piece
By Rolf Beuttenmuller and Charles Hand
Beginners and seasoned scrollers alike often find fretwork intimidating. High-hole-count patterns can seem impossible at first glance—but in reality, they are simply large collections of holes. If you can follow a line, then you can cut a complex fretwork project! That said, here are a few key things to consider before you tackle your first one. After learning about these helpful fretwork tips and tricks, put them to the test by scrolling a majestic gray wolf portrait.
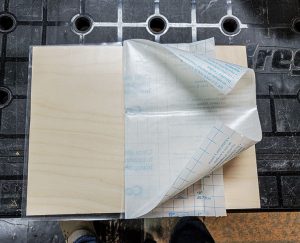
Choose the Right MaterialsIf you prefer thin stock, plywood is a good choice because the perpendicular grain layers make it more resistant to breakage. We typically stack around three pieces of 1/8″ (3mm) Baltic birch for one project, taping the edges together to keep the layers from separating. This method has three main advantages: 1. It gives the thin pieces more support. 2. The added thickness slows your cutting speed for more control. 3. You will have three completed pieces in the time it would usually take to cut one. If you prefer solid hardwoods, however, choose a thicker stock and keep the grain direction in mind as you’re orienting the pattern. After selecting your wood, apply the pattern. You can attach it to Con-Tact® brand clear removable shelf paper, as it’s easy to remove after cutting. You could also cover the blank with blue painter’s tape and attach the pattern to the tape with spray adhesive. The last thing you want is a pattern that won’t come off, as this interferes with sanding and finishing and could result in breaks down the road. |
 |
Pre-Sand Your BlanksYou will have difficulty sanding without damage after the piece is completely cut. So, consider pre-sanding your blanks to 320-grit and then removing sanding dust with a clean tack cloth. |
 |
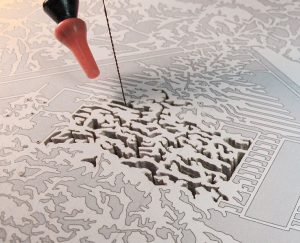
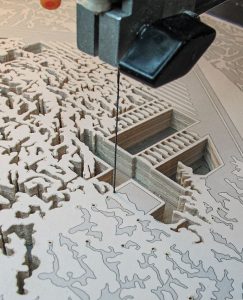
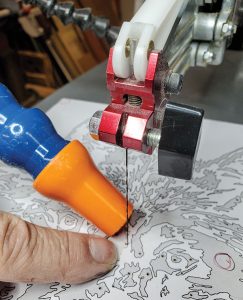
Don’t Drill All the Holes at OnceInstead of drilling all the blade-entry holes at once, try drilling holes in approximately 15 to 20 cutouts at a time, starting at the center. Cutting in increments makes the piece feel more manageable and maintains stability for a longer period of time. |
 |
Pick the Right BladeUse a high-tooth-count blade, such as #2/0 at 28 TPI (teeth per inch), for more precise, controlled cutting. If the piece contains many irregularly shaped holes, consider using a spiral blade. Spiral blades leave a rougher edge and more fuzzies, but can save you time and effort, especially on difficult turns. For long, straight cuts, a straight blade is ideal. Note: If the design has a mixture of irregular cuts and long, straight cuts, you may need to switch blade types partway through the project. Practice the spiral blade before you commit to using it in a complex piece. |
 |
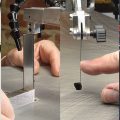
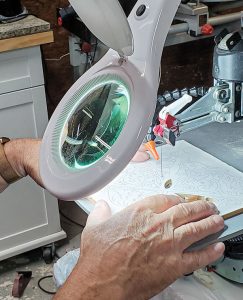
Grab Your GearWith intricate projects, a magnifier with good lighting can be a huge help. A headlamp can also be useful in fine detail work. |
 |
Cut from the Center OutCutting from the center out adds more stability to the piece; it will also keep the project more centered on your scroll saw table, supporting the most delicate sections and reducing the chance of breakage. |
 |
Feed from the TopIf your scroll saw has top-feeding capability, get comfortable with that feature. Your back and neck will thank you! |
 |
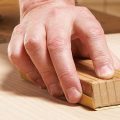
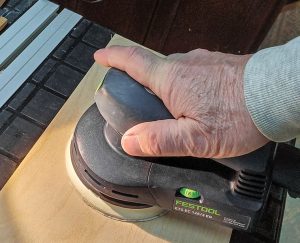
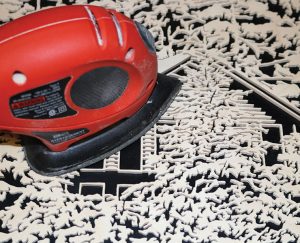
Sand as You GoAfter cutting each section of 15 to 20 cutouts (or less, if it makes sense for your project), flip the piece over. Then sand lightly with a palm sander or sanding block to remove most fuzzies. Hold the sander as flat as possible so as not to damage the workpiece; little cutouts, like hangnails, are easy to catch and tear. Sanding this way will make for less cleanup after the piece is complete.
|
 |
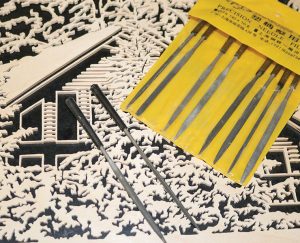
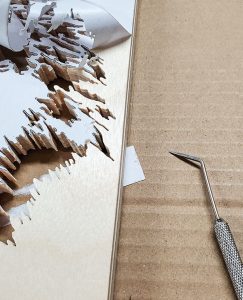
Don’t Trip at the Finish LineOnce your cuts are complete, remove the pattern very carefully to avoid snapping any pieces. Use a dental pick to get under the pattern and needle files for the insides of small frets. Heavy-duty sanders are not welcome at this stage, as they could ruin hours of painstaking work. To minimize wear on delicate bridges, consider applying a spray finish rather than a brush-on. Clear spray lacquer works well. For a more colorful look, consider a spray paint-and-primer combo. If you plan to display the piece behind glass, a satin finish may be preferable to gloss; if you’re leaving it plain, gloss or semigloss work well. |
 |
 |
| About the Authors |
|
Rolf Beuttenmuller started scrolling in 2004 after his wife, June, bought him a scroll saw for his birthday. He joined a local club and enjoys new and challenging projects. His motto is, “I don’t know that I can’t, therefore I can.” Rolf retired from Brookhaven National Lab after 34 years of designing and building special devices for high energy and photon science research. He lives in Bellport, N.Y. Charles Hand is retired from a career in electrical/mechanical design, graphic arts, and senior project management. He enjoys intarsia, fretwork, segmentation, inlay, and just about everything there is to cut with a scroll saw. Charles has won best of show and several other awards for his work and designs at local craft and woodworking shows. For more information and a tutorial on Charles’ pattern application method and framing techniques, or for more of his patterns, visit scrollsawart4u.weebly.com. |
 |
Purchase our winter issue!
Click for Winter Issue
For more articles like these, subscribe to Scroll Saw Woodworking & Crafts magazine. SubscribePlus! Get mini magazines in your e-mail between printed issues with Short Cuts, our e-mail newsletter. |