Reduce the time you spend sanding and produce a flawless finish
By Staff of Scroll Saw Woodworking & Crafts
“Nothing affects the final finish as much as sanding does,” says furniture maker Mark Love. That is true regardless of the finish you apply. But there are all sorts of questions about sanding: What is the best sandpaper to use? Do I really have to use all these grits? What is the highest grit I should sand to? Once you learn all the sanding tips below, try them out on your next scroll saw project such as a fish trivet perfect for your next cookout!
Buy Colored SandpaperIronically, sandpaper in shades of brown—the color of sand—isn’t the best choice because it dulls and clogs quickly. Instead, choose paper in rainbow colors, like Norton 3X, Klingspor PS33 Stearate, 3M 216U Gold, 3M SandBlaster, and 3M Pro Grade. The manufacturers use the colors to draw attention to their best products, which are made with premium aluminum oxide abrasive that’s graded for consistent size, applied in an open coat, resin-bonded to a flexible lightweight backing, and covered with an anti-clogging material. |
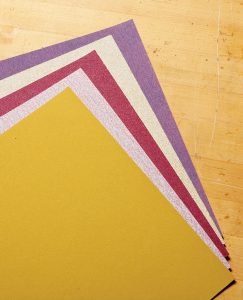
Colored sandpapers are higher quality grades with premium abrasives, more flexible backing, and anti-clog properties. |
When Do I Need a New Sheet?The abrasive on the sandpaper wears away as you use it. Premium sandpaper lasts longer, but still needs to be replaced regularly. Save yourself time and frustration by grabbing a new sheet of sandpaper frequently. Some people save old sandpaper to use in place of finer-grit sandpaper. While some of the particles have probably worn down into finer grits, not every particle will break down. That leaves you with some large grit mixed in with the finer grit—and the large grit will still leave large scratches. I recommend tossing the old paper and buying fine-grit paper. |
Skipping GritsIf you’re working with soft wood, such as pine, you can skip a few grits as you work through a progression because the soft wood makes it easy to sand out the scratches from the coarser grit. I’ll often start with 80 grit, move on to 120 to 150 grit, and finish with 220 grit. For harder wood, such as maple or cherry, work your way up through the grits. The progressively finer grits of sandpaper quickly remove the deeper scratches from the coarser sandpaper. It takes a lot longer to sand out the scratches from 80-grit sandpaper in hard woods with |
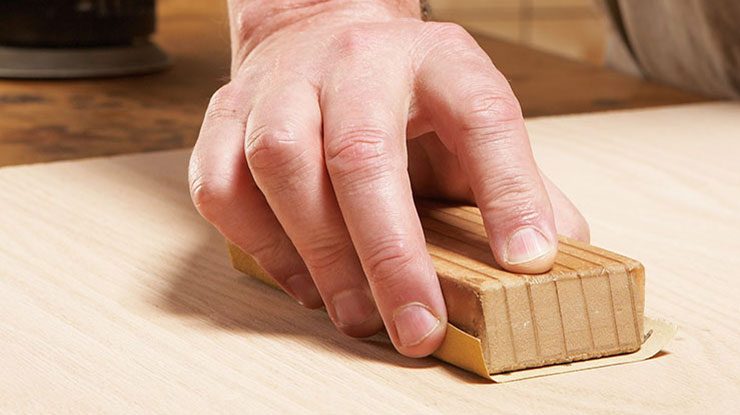
Always Finish Sanding by HandHand sanding with the grain should always be your last step before applying a finish. Power sanding may be a real time-saver, but it rarely leaves surfaces that are entirely scratch-free. Hand sanding after power sanding aligns all the sanding scratches so that the grain will help hide them. Here are a few tips for hand sanding: • Bearing down when you sand by hand is OK. In fact, it speeds up the process. • Using a cork-faced sanding block helps to evenly distribute the sanding pressure. • Start with the same grit size that you used for your last round of power sanding. If visible scratches from power sanding remain after hand sanding, switch to slightly coarser grit and start again. • Sand diagonally, and change direction when you change grits. That way you can see when you’ve removed the scratches from the previous grit. • Sand with the grain for the final, finest grit. |
Sanding for a Stained FinishDeep scratches from coarser grits of sandpaper and cross-grain scratches really show up when you apply a stain because the solid pigment particles concentrate in the scratches. Most stain manufacturers suggest you stop sanding at 220 grit, though, because those same solid pigments need a place to lodge, and they are too large to catch on the ultra-smooth surface created by the finest grits of sandpaper. The exception is visible end grain. The pores that make up the wood grain are usually open in the end grain. Not only is the end grain harder than the long grain, so scratches take longer to remove, but these pores will soak up stain and make the end grain look darker than the other areas. Sand end grain to at least two grits higher than you sand the long grain. The finer grits help close the pores and remove deep scratches to help match the end grain color to the long grain color. The end grain will look better, too, because the annual ring structure will show clearly. |
Sanding for an Oil FinishBecause oil finishes like Danish or tung oil usually soak into the wood, the finish itself will not fill any scratches. For a smooth, clear finish, I hand-sand up to 400 or even 600 grit before I apply the oil. To give the piece a glossy finish, allow the oil finish to dry and then buff with 0000 steel wool before applying the next coat. |
Sanding for a Film FinishWhen I plan to apply a film finish like lacquer, varnish, or shellac, I usually stop sanding at 180-grit sandpaper. I don’t need to use finer sandpaper because film finishes build up on top of the wood and fill the scratches left by the slightly coarser paper. That said, I sand the dry finish between coats with 400-grit sandpaper to smooth and level the finish and remove drips and runs. After I apply the final coat, I buff the finish with 1,000-grit sandpaper and then 0000 steel wool. |
 |
Purchase our summer issue!
Click for Summer Issue
For more articles like these, subscribe to Scroll Saw Woodworking & Crafts magazine. SubscribePlus! Get mini magazines in your e-mail between printed issues with Short Cuts, our e-mail newsletter. |