Check the blade, angle, tension, and speed before scrolling
By Tom Thompkins
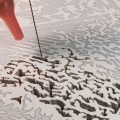
We’ve all experienced those perfect moments at our scroll saws when the blade seems to glide effortlessly through the wood, following the cutting line as if it had eyes, and the project is cut out almost before you know it. I call them “Ah” moments—as opposed to “Ah, &%#@” moments. The trick to increasing the frequency of those moments is to establish a routine that you repeat every time you sit down at the saw and every time you change blades. I use a simple acronym: BATS. After going through your BATS checklist, fire up your scroll saw and make a raven puzzle that is the perfect project to kick off the fall season with!
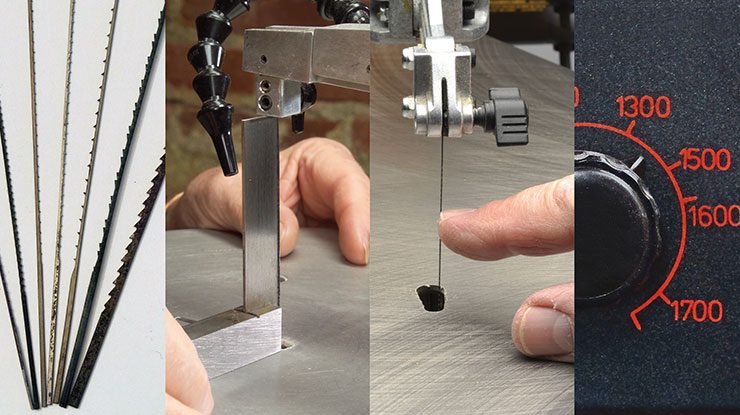
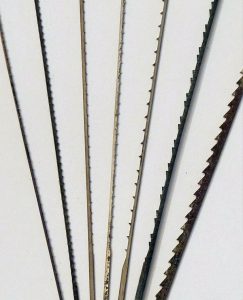
B is for BladeBlade selection is something most of us do automatically, often because we have developed a degree of comfort with one particular size and type of blade. The truth is, unless you only saw one type and one thickness of wood, you need a variety of blades to get the job done properly. Instead of automatically inserting the same type of blade every time, ask yourself these questions: What type of material am I cutting? Will I need to make tight turns or long smooth cuts? Will the thickness of the blade (kerf) be a factor in the final fit of my project? With those answers in mind, choose a blade that matches your project. (See Scroll Saw Woodworking & Crafts Spring 2013, Issue 50, or visit www.scrollsawer.com for a helpful blade-choice chart.) Finally, ask yourself: Is the blade mounted correctly in the saw? I have installed a blade or two upside-down. Sometimes—especially when using smaller blades like #2/0 or #1—it’s hard to tell. Here’s a technique I have found works every time. After you have made your best guess and installed the blade, put it under tension and lightly run your fingertip up the teeth. If it snags your skin, then the points are angled downward and the blade is installed correctly. If your finger slides smoothly up the blade, the blade is upside down. Doing this test without the blade under tension simply doesn’t give you the same clear information. |
|
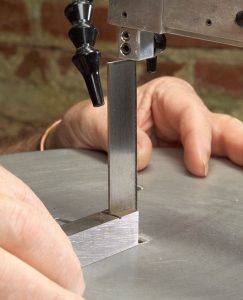
A is for AngleMost scroll saw tables today have some mechanism for adjusting the angle of the cut, and if you enjoy making a variety of projects, chances are you adjust the angle frequently. It’s pretty easy to tell if the table is angled 20°, but it may not be that easy to notice a 1° or 2° angle until you have begun cutting. By then, your piece is ruined and you have to start over again. Prevent those problems by checking the angle every time. You cannot rely on your saw’s angle indicator—I have seen many saws that were off by 1/2° to 1°. Using a small plastic or metal right angle, rest one side on the table, and then slide the perpendicular edge up against the blade. If it is perfectly square, the edge will line up perfectly with the blade. If it is off even a little, it will be obvious and you can easily make adjustments. |
|
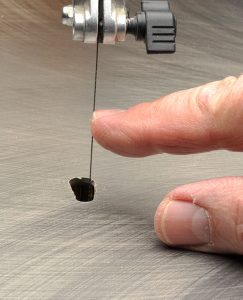
T is for TensionThere have been several methods proposed to determine proper blade tension. One author suggested achieving a specific musical note when the blade is “plucked” like a guitar string. I must be tone-deaf, because that technique has never worked for me. I rely on the first technique I was ever taught: the blade should not flex more than 1/16″ (2mm) when pushed from side to side or back and forth. Inadequate blade tension produces wandering blades and undesirable angles of cut. Too much tension increases the rate of blade breakage, so make sure you have adjusted the tension properly. |
|
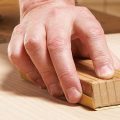
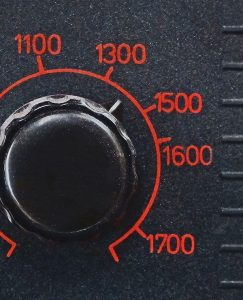
S is for SpeedI think this breaks down into two subsets: blade speed (often listed as strokes per minute/SPM) and the rate at which you feed your work into the blade. My saw provides a listing of SPM, and I’ve found that 1400 SPM has worked for me over the years for most types of wood I cut. Extremely hard woods, such as ebony or maple, may require a slight increase in blade speed to accomplish a smooth cut, but I rarely exceed 1600 SPM. Not every saw provides this information. The point is to find a speed setting that works for you, and double check to make sure the speed setting doesn’t change as you cut, such as after you change blades. I have found that the rate at which I feed the work into the blade is what gives me the best control of the cut. I can still hear my seventh grade woodshop teacher, Mr. Thompson, telling us, “Let the blade do the cutting for you.” The rate of feed should be constant, smooth, and effortless. If you are pushing too hard or possibly flexing the blade from the side, try slowing down and letting the blade do the work. If it still doesn’t go smoothly, change blades. Chances are your blade is dull, or you may simply be using the wrong blade for the job. I was taught to change blades whenever it occurred to me to do so. I still work on that basis because my subconscious mind is picking up on something of which I may not consciously be aware. |
|
ConclusionSo there it is: BATS—Blade, Angle, Tension, Speed. Success starts with the saw, so if you use this acronym every time you sit down at the saw and each time you change blades, those “Ah” moments will become much more frequent. You’ll be happier and your projects will be better, guaranteed. |
| About the Author |
|
Tom Thompkins was a member of Judy Gale Roberts’ first intarsia class. He has completed hundreds of projects, won national and international awards for his work, and has taught intarsia in numerous Southern California venues. |
 |
Purchase our fall issue!
Click for Fall Issue
For more articles like these, subscribe to Scroll Saw Woodworking & Crafts magazine. SubscribePlus! Get mini magazines in your e-mail between printed issues with Short Cuts, our e-mail newsletter. |