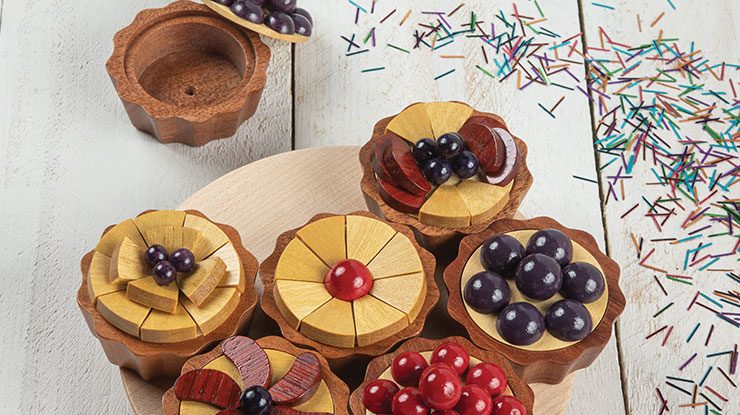
Add some fun and vibrant fruit designs to your tartlet keepsake boxes
By Carole Rothman
I designed these delicious tartlets to double as keepsake boxes to hide small treasures as well as be aesthetically pleasing. There are so many different ways you can decorate the box lids with fruit designs ranging from wild berries to tropical fruits. After cutting out your desired fruit toppings included in my “Fruit Tartlet Boxes” article from the summer issue, follow the instructions below to make your tartlet boxes unique and good enough to eat.
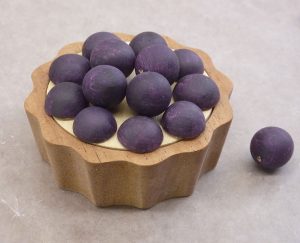
Blueberry or Cherry Tartlet
| Ten 9/16″ (15mm) painted wooden balls: five whole and nine halves
Lightly sand the drilled end of four of the balls with a sanding block or sanding tile to clean and flatten the gluing surface. With the lid on the tartlet shell, use tape loops to position the halves around the edge of the lid, extending them slightly over the edge. Use tape loops to position the four sanded balls in the center, sanded side against the lid. Remove the lid and place on wax paper. Glue the four center balls first. To do this, squeeze a small amount of CA glue on the wax paper. Remove one ball and its tape loop. Apply glue to the sanded bottom with a toothpick, and then return the ball to its original position. Press down until set. Repeat for the next three balls. Tweezers add extra control for placing round balls. Then, glue on the halves, one at a time, applying the glue to the underside with a toothpick. A small piece of dry paper towel at the end of a toothpick works well to remove excess glue. Glue the last ball into place on top of the center four. Finish the lid with a sealer coat of shellac and several coats of gloss spray lacquer, and then let dry fully. |
|
Pineapple-Blueberry Tartlet
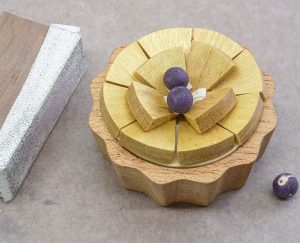
| 12 pineapple wedges
Blueberries: Three 3/8″ (10mm) wooden balls, painted blue With the lid in place, tape eight wedges evenly around the circumference, extending them slightly over the edge of the lid. Remove the lid and place on wax paper. Squeeze a small amount of CA glue on the wax paper. Apply glue to the underside of each wedge and press it into place. When these wedges are set, position the remaining four in the center, sanding or cutting them to fit. Glue them into place. Sand the drilled side of the balls with a sanding tile or block to flatten the gluing surface. Tape then into position, and then glue into place. Finish the lid with a sealer coat of shellac and several coats of gloss spray lacquer, and then let dry fully. |
 |
Pineapple-Cherry Tartlet
| Eight pineapple wedges
Cherry: Half of a 13/16″ (20mm) wooden ball, painted red With the lid in place on the tartlet shell, tape the half ball to the center of the lid. Tape the eight wedges evenly around it. Remove the lid and place on wax paper. Glue the half ball first, and then the eight wedges. Finish the lid with a sealer coat of shellac and several coats of gloss spray lacquer, and then let dry fully. |
Orange Tartlet
| Six orange segments
Blueberry: 15/32″ (12mm) wooden ball. Cut away 1/16” (2mm) from the drilled side to create a flat gluing surface, and then paint the remainder of the ball blue. With the lid in place on the tartlet shell, use loops of tape to attach the ball to the center and the segments around it in a wheel pattern. Remove the lid and place on wax paper. Glue the ball first, and then the segments. Finish the lid with a sealer coat of shellac and several coats of gloss spray lacquer, and then let dry fully. |
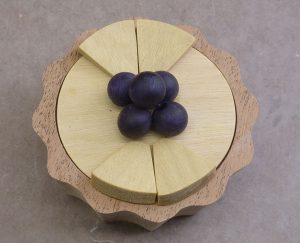
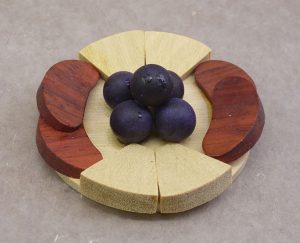
Orange-Pineapple-Blueberry Tartlet
| Six orange segments
Four pineapple wedges Blueberries: Five 15/32″ (12mm) balls, painted blue With the lid placed on wax paper, place a lid pattern on top and mark the center point with an awl. Flatten the drilled ends of four of the balls slightly by sanding. Tape them, sides touching, around the awl mark. Glue them into place, one at a time, then glue the fifth ball on top. Tape one pair of pineapple wedges on one side of the lid, and then another pair directly opposite. They should face the center and extend slightly over the edge of the lid. Tape two pairs of overlapping orange segments in the same manner, using the remaining two spaces. If more room is needed, sand the sides of the pineapple segments slightly. Position a third orange segment in front of each overlapping group to check the fit, and then remove it. Glue the pineapple wedges into place, and then the two sets of orange segments. Glue the third orange segment for each group into place. Finish the lid with a sealer coat of shellac and several coats of gloss spray lacquer, and then let dry fully. |
|
Plum Tartlet
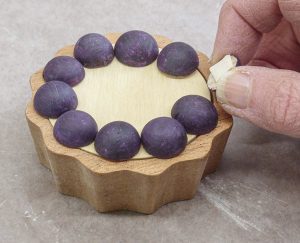
| Plums: Four 13/16″ (20mm) balls painted purple. Cut three in half. Trim 1/16” (2mm) from the drilled side of the remaining ball to create a flat gluing surface.
Tape the whole ball into the center of the lid, and then tape the six halves evenly around it. Glue the whole ball into place first, followed by the halves. Finish the lid with a sealer coat of shellac and several coats of gloss spray lacquer, and then let dry fully. |
Materials• Wood, such as yellowheart, 3/8″ (1cm) thick: strip for pineapple wedges, 1″ (2.5cm) long x 4″ (10.2cm) wide • Wood, such as padauk, 3/8″ (1cm) thick: strip for orange segments, 3/4″ (1.9cm) long x 4″ (10.2cm) wide • Wooden balls: 3/8″ (10mm)-dia. (small center blueberries); 15/32″ (12mm)-dia. (medium center blueberries); 9/16″ (15mm)-dia.(blueberries, cherries); 13/16″ (20mm)-dia. (center cherry, plums) • Glue: cyanoacrylate (CA), wood • Tape: blue painter’s or masking • Shellac, spray or regular • Spray lacquer • Wax paper • Toothpicks • Acrylic paints: assorted • Paper towels
|
Tools• Tweezers |
| About the Author |
|
Carole Rothman of Pawling, N.Y., is a retired psychologist and college professor. She is also an award-winning cake decorator. Visit Carole online at scrollsawbowls.blogspot.com. You’ll find her books, Creative Wooden Boxes from the Scroll Saw and Scroll Saw Wooden Bowls: Revised & Expanded Edition, at foxchapelpublishing.com. |
 |
Purchase our summer issue!
Purchase Our Summer Issue Here!
For more articles like these, subscribe to Scroll Saw Woodworking & Crafts magazine. SubscribePlus! Get mini magazines in your e-mail between printed issues with Short Cuts, our e-mail newsletter. |


