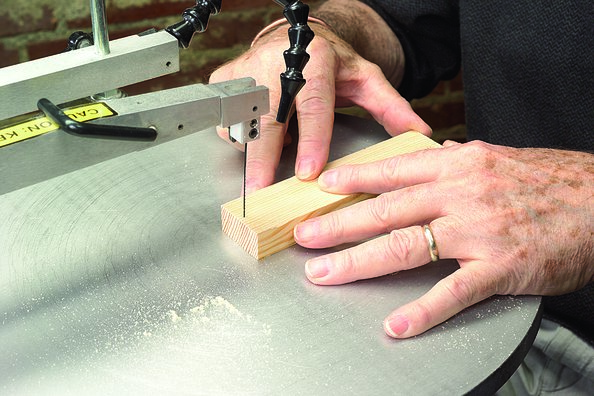
 It’s all just one cut at a time
Chances are, the first time you saw a fretwork piece, your first thought was, “Wow.” And the second was “I could never do that.” That’s where you’re wrong, my friend. With just a few pointers and patience, you can scroll even the most complex fretwork design.
Select The Wood
After choosing the pattern we want to cut, the next step is to select the wood. Take a minute to examine the pattern and wood grain. Many times there are grains or defects in the wood that could complement the pattern. Try to imagine the colors and grains of the wood that would be left on the final piece after cutting is complete. It is surprising how much you can change the looks of a piece just with the grain.
Drill the Holes
Now with the pattern applied, it is time to drill the holes. The size of the areas to be cut out determines the size of the drill bit you’ll need. The bit needs to be smaller than the area to cut out, but large enough to feed the blade into. Usually the largest bit I use is a 1¾4″ because it creates a hole that is more than large enough to feed a blade through. Other good choices to have in your kit are 1¾8″ and 1¾16″ drill bits. These will work well in most areas.
For the even smaller areas, there are mini drill bits, which can be purchased as a set, or individually. These range in size from .0139 up to .039, compared to a 1¾16″ drill bit that is .0652. Some drill chucks will hold the larger mini bits just fine, but normally for the really tiny sizes you will need a pin vise, available from the same sources as the bits. A pin vise is a miniature drill bit chuck with a larger shank on it. The larger shank is chucked into your drill chuck, and then the mini bit is chucked into the pin vise chuck.
Drilling the holes in the right place can be a time saver when you start cutting. If you drill the hole in the center of the area, you will be cutting through a lot of waste wood just to get to the cutting line on the pattern. Usually at a corner or along the straight line are good choices for hole placement. The hole should be near the cutting line but not so close that you nick the cutting line.
Drilling can be accomplished in many ways. A cordless or electric drill may be what you use. A step higher would be a drill press. I prefer moto tools. These little tools will hold small drill bits with the use of the right size of collets. And they are lightweight, fast and easy to maneuver around the workpiece as you drill the holes.
After all of the holes are drilled, it is time to start cutting. If you are using a saw that uses pin-end blades, larger holes are needed to get the pin through. The pin is longer than the blade is wide, so it takes a larger hole for the pin, than just the bare blade. To work around the pin limitation, you can remove the pin and replace it with a safety pin. (Use a hammer and punch to drive the pin out from the top of the blade. It’s best if you place the pin against a piece of wood. Once you strike the pin, it will leave the blade and stay in the wood.) The plain-end blades can be fed through a lot smaller hole, and come in smaller sizes, allowing you to cut finer detail.
Different saws, because of the blade clamp design, require different ways to thread the blade. For most saws, you will release the blade from the top clamp and feed the blade up from the bottom of the wood. The best way I find to do this is raise the arm up to the top position. Slide the wood under the arm so the hole you are trying to feed the blade into is under the top blade clamp. Now grab the end of the blade between the wood and table, and flex it around to feed the top end through the hole. The blades will take a lot of flexing without breaking. With bottom-threading saws, seeing the hole can be a problem. The Olson Saw Company makes a light that mounts under the table. The light shines through a hole you have drilled into the table, onto the bottom of the wood, making the hole easier to see.
Seeing the hole is generally not a problem with top-threading saws. After releasing the tension, release the blade from the bottom clamp. As you raise the top arm, the blade lifts up out of the wood. Slide the next hole in the wood into alignment with the hole in the table, then feed the bottom end of the blade into the hole as you lower the arm, then clamp the blade back into the lower clamp. And on a few saws, both the top and bottom clamp can be removed. Remove one clamp and feed the blade through the wood, then install the clamp on the other end of the blade. Now the wood and blade, with clamps on both ends, is fed through the slot in the table, inserting the clamps into the blade clamp holders on the arms of the saw.
Regardless of the type of saw you have and how you change the blades, the same thing is accomplished: You end up with the blade threaded through the hole so you can make the next cut. You just cut that area out, release the blade and do it all over again. Before you realize it, the project is completed.
Tip: Blade Entry Holes for Stack Cuts
To maximize your yield when stack cutting, you want all of your layers to be perfect. They won’t be if your entry holes are at an angle as they go through the stack. Your best bet is to use a drill press. If you don’t have a drill press, then make extra sure that your drill bit goes straight into the wood. And, for best results, always drill into a backer. Any tear out will be in the backer and not in the bottom layer of your stack.
Tip: Attaching the Pattern
The easiest way is to photocopy it and attach with spray glue. All of the sprays seem to work differently, so practice is the secret to success. If you cannot get the pattern off the wood after cutting, try heating it with a heat gun, or spraying it with paint thinner or lacquer thinner. If the patterns fall off the wood before you are done, you probably let the glue dry too long before applying the pattern.


