
Resin adds a stained-glass effect to fretwork ornaments
By Clayton Meyers
Growing up, Christmas was a huge deal in my family. Every room of the house was decorated. Every window had electric candles, and even the front yard was covered in Christmas décor. That’s probably why so many of my designs revolve around this holiday. I love giving handmade projects to my friends and family every year, and these fretwork snowflakes look great hanging on the tree. But if you fill the openings with some colored resin and hang them in your window, you can take them to a whole new level, as light shines through them to create a stained-glass effect. This project will show you how to pour small amounts accurately so you can fill in any design like you’re coloring a picture.
These are simple fretwork scroll saw designs that are easy to execute for any skill level. Simply fill in the cutouts to make any fretwork project a stained-glass piece of art. Note: Make sure to wear disposable nitrile gloves and a dust mask when handling uncured resin.
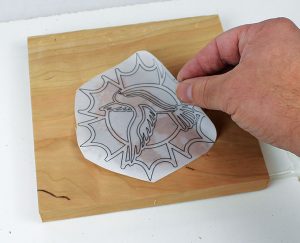
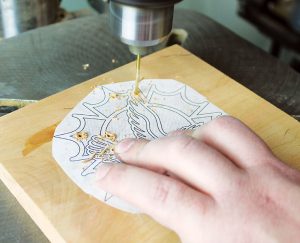
Getting StartedCoat the back of the pattern with spray adhesive, and then apply the pattern to the surface of the wood plank. I used cherry. Be generous with the amount of spray adhesive used. If there is not enough, the pattern will start to peel off as you cut. Once the spray adhesive dries, use a drill press to drill pilot holes 1/8″ (3mm) in diameter. |
 |
 |
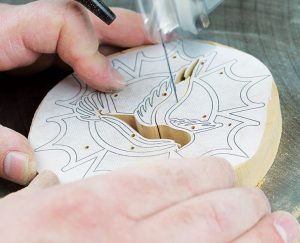
Step 1Cut all the inside cuts. Using a #5 standard blade in your scroll saw, start cutting out the inside shaded areas of the project. There is no right place to start, but I like to start close to the center and work my way out from there. |
 |
Step 2Sand the edges. Use 120-grit sandpaper to knock any loose wood burrs or dust off the freshly cut edges. |
 |
Step 3Seal the edges. Use a small paintbrush and polyurethane to seal the sides of the cutout areas of the inside cuts. This will prevent the resin from soaking through the grain, which will cause color bleed. |
 |
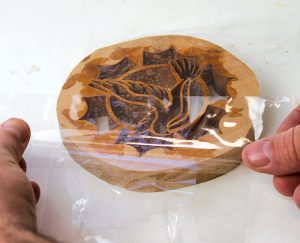
Step 4Create a mold. Use clear packaging tape to close off the bottom of all the inside cuts. Use several layers and press it firmly onto the wood. This will create a tray for your resin pour. |
 |
 |
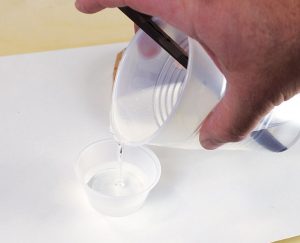
Step 5Mix the resin. Mix approximately 6oz. (177.4ml) of tabletop epoxy resin. Once mixed, separate it into several smaller cups. These will turn into the individual colors that will get poured. |
 |
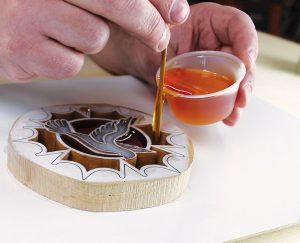
Step 6Mix in color and pour the resin. Put a few drops of color of your choice into the smaller cups and mix them thoroughly. Pour the colored resin into whichever sections that you want, using a small stick to direct the pour. Hold the stick against the edge of the cup and tilt the cup until the resin begins creeping down the stick. This will give a very narrow stream that is easy to direct. |
 |
 |
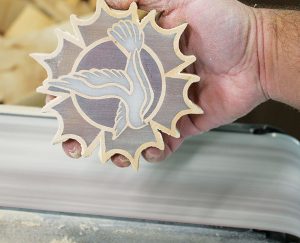
Step 7Allow the epoxy to harden, then cut. Place the filled project off to the side where it won’t collect dust and let it set to harden for at least 24 to 48 hours (check manufacturer’s instructions). Once it’s hardened, take it back to the scroll saw and cut out the final shape of |
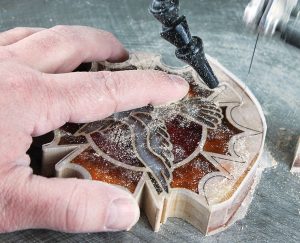 |
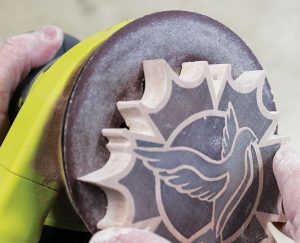
Step 8Sand off the pattern and tape. Use a belt sander to sand flat the top and bottom of the workpiece. Sand low enough that the pattern and tape are sanded off and any low spots where the resin shrank are now flat. |
 |
 |
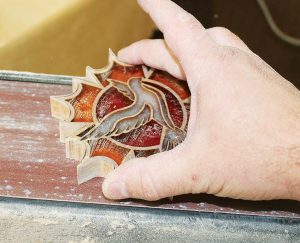
Step 9Sand the workpiece smooth. Hand-sand both sides and all edges starting with 120-grit and then 220-grit. Use 320-grit to achieve a super smooth finish. You can do this by hand or with an orbital sander. |
 |
FinishingClean every crevice and corner with a damp cloth to remove any residual dust before applying the final coat. I like to use a high-gloss acrylic spray paint to finish these off. It fills in any small scratches or sanding marks. Apply multiple coats to both sides and all edges, allowing time for each coat to dry before moving to the next. Use the 1/16″ bit to drill a small hole for decorative hanging string, if desired. |
When Leaks HappenLeaks can happen in the moment. When pouring multiple colors, if you don’t have a good seal, the colors will bleed into each other. Since there is not much you can to stop the leakage, it’s best to stop what you are doing, pour out as much resin as you can into a garbage bag, remove the bottom layer of tape, and let the remaining resin residue harden. Then try again, making sure to press the tape firmly along all the bottom edges. |
|
Materials • Wood blank, 3/4″ (1.9cm) thick: 6″ (15.2cm) square • Spray adhesive • Clear packaging tape • Resin, 4-6oz. • Transparent resin dyes • Sandpaper: various grits to 320 • Polyurethane • Clean cloth • Finish: clear spray laquer |
Tools • Drill with bits: 1/16″ (2mm), 3/32″ (2.4cm), 1/8″ (3mm) • Scroll saw with blades: #5 reverse-tooth • Sanders: belt, orbital • Combination square • Small paintbrush • Small stick |
| About the Author |
|
Clayton Meyers has been woodworking since age six. He began compound-cutting about 12 years ago. He enjoys trying new techniques to achieve unique and beautiful results. Clayton recently moved from Indiana to Michigan, where he works as a mechanical engineer in the medical industry. He uses woodworking as a form of stress relief and relaxation. Find more of his work on Etsy at ClaytonsPatterns. |
 |
Purchase our winter issue!
Click for Winter Issue
For more articles like these, subscribe to Scroll Saw Woodworking & Crafts magazine. SubscribePlus! Get mini magazines in your e-mail between printed issues with Short Cuts, our e-mail newsletter. |