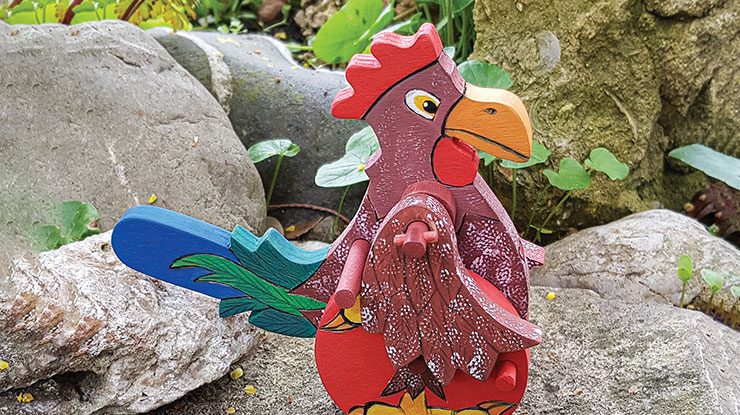
Roll along with this cute barnyard-inspired toy
By Cony Zwahlen
While cleaning a friend’s house one day, I discovered a funny chicken toy. I thought it would be the perfect gift for a friend’s daughter, so I recreated the toy and made it a rooster. My friend’s daughter was very happy about it. I wish you just as much joy with your wheely rooster.
Getting StartedCover the wood with painter’s tape and attach the patterns to the surface of the tape with spray adhesive. Drill 1/4″ (6mm) holes where noted on the patterns. Cut all the parts on a scroll saw. Remove the tape and patterns, and then sand the pieces progressively to 320-grit. Cut the dowels to size. Then secure Dowel 2 (the dowel for the wing lock) and drill 1/8″ (3mm)-dia. hole on either end as noted in the assembly drawing. This is where you will insert the shoulder bar later. Remove dust with a tack cloth. Use a woodburner to outline the features, referring to the dotted lines on the pattern; this will also keep paint from bleeding into different areas later. Paint the pieces, making sure to paint the feet so they are mirror-inverted. Use as much or as little detail as you like. Let dry. |
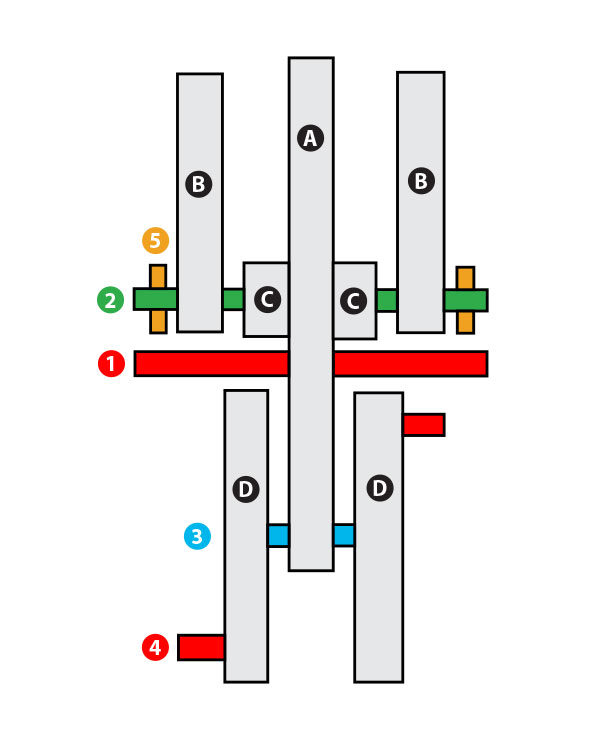
Assembling the RoosterRefer to the assembly drawing at right to assemble the project. Put a little glue in the top two holes of the body and insert the shoulder bar and wing lock. The ends of the dowels must protrude equally on both sides. Then slide the spacers onto both ends of the shoulder bar with the rounded sides of the spacers pointing upward. Slide the wings onto the shoulder bar, making sure they can move freely. Glue the wing brackets (labeled #5) into the drilled holes in the ends of the shoulder bar (labeled #2). Dab some glue into the holes near the perimeter of the wheels and insert the cams (labeled #4). Glue a wheel to the axle (labeled #3). Then, push the axle through the hole and glue the other wheel to the axle, leaving some room for free movement. The wheel cams must sit opposite each other, and the axle must move easily. Now your rolling rooster with flapping wings is complete! |
 |
|
Materials • Wood, such as birch plywood, 1/4″ (6mm) thick: body, 4 3/4″ x 5 1/2″ (12cm x 13.9cm) • Wood, such as birch plywood, 1/4″ (6mm): wings, 2 each 1 3/4″ x 2 1/2″ (4.4cm x 6.3cm) • Wood, such as birch plywood, 1/4″ (6mm): spacers, 2 each 3/4″ (1.9cm) square • Wood, such as birch plywood, 1/4″ (6mm): wheels, 2 each 2 5/8″ (6.6cm) square • Dowel 2, 1/4″ (6mm)-dia.: wing lock, 1 3/4″ (4.5cm) long • Dowel 1,1/4″ (6mm)-dia.: shoulder bar, 2 3/4″ (7cm) long • Dowel 3, 1/4″ (6mm)-dia.: wheel axle, 1″ (2.5cm) long • Dowel 4, 1/4″ (6mm)-dia.: cams, 2 each 11/16″ (1.8cm) long • Dowel 5, 1/8″ (3mm)-dia.: 2 each 1/2″ (1.2cm) long • Spray adhesive • Tape: painter’s • Sandpaper: assorted grits to 320 • Pencil • Acrylic paints: black, blue, green, orange, red, teal, white, orange • Glue: wood • Tack cloth |
Tools • Scroll saw with blades: #5 reverse-tooth • Drill with bits: 1/8″ (3mm), 1/4″ (6mm)-dia. • Paintbrushes: assorted • Woodburner with nib: writing |
| About the Author |
|
Cony Zwahlen began glass burning and woodcarving in 2019 after a 23-year career as a plasterer. Cony lives in Switzerland and is inspired by nature and animals, especially her dog, Gioia. See more of Cony’s work on Instagram @conyzwahlen. |
 |
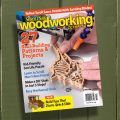
Purchase our fall issue!
Click for Fall Issue
For more articles like these, subscribe to Scroll Saw Woodworking & Crafts magazine. SubscribePlus! Get mini magazines in your e-mail between printed issues with Short Cuts, our e-mail newsletter. |