 Use a common word processing program to create custom patterns
By Jon Deck
Being a graphic designer, schooled and skilled in the Adobe creative applications, I never had much use for Microsoft Word. When we decided to find an easy way to make word art patterns, I immediately thought of InDesign … but it can be as challenging to other people as Word is to me. More importantly, our readers probably don’t have access to expensive creative applications, but they do have Microsoft Word. And if I can learn how use it, anyone can.
A Word About Word Art
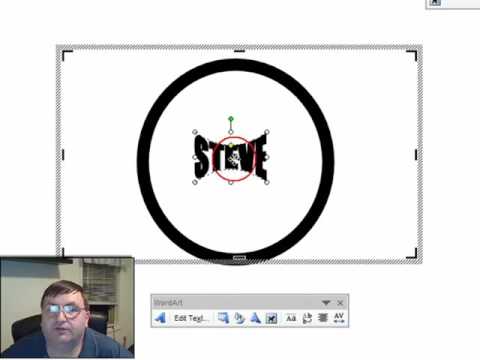
Word art patterns are similar to fretwork patterns, in that all of the pieces must be connected with bridges or they will be lost. If any letterform in your phrase is not joined to the others, it will be cut away.
The creative part of producing word art is combining the letters in a pleasing design. Use different fonts, mingle upper case text with lower case, combine Roman and serif or standard and italic fonts, and vary the sizes of the text so your word art makes a statement!
Making A Basic Word Art Pattern in Word
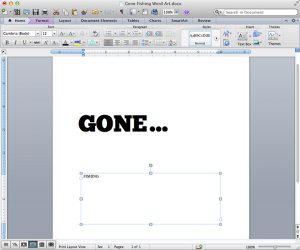 |
Step 1: Make separate text boxes for each line of text in the phrase (Insert/Text Box). Type the text and style it with your chosen font(s). Work as large as you can on the page. Stretch the text boxes as wide as possible across the page. When the longest line of text is on the page, increase the font point size as large as possible. |
 |
Step 2: Make any adjustments in size, font, or style before you begin to format the letters. Move the text boxes to test their relationship to each other (remember, the letters must touch each other). |
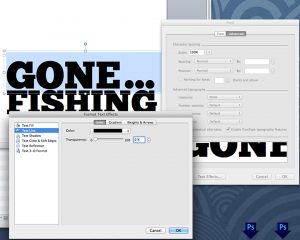 |
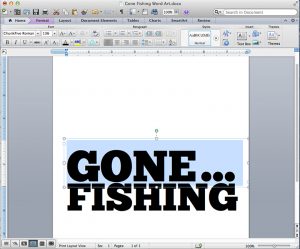
Step 3: Highlight the text in a box, and go to Format–> Font in the top menu bar. In the Font dialog box, choose the advanced tab and click Text Effects at the bottom of the box. In Text Effects, from the menu on the left side, choose Text Fill, and give your word a solid 15% fill of Black. Then choose Text Line, and select a solid Black line. Click through all the OKs, and see the word is outlined and filled as a pattern would be. Repeat with all of the text boxes in your design. |
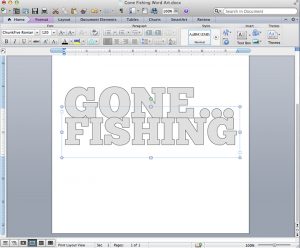 |
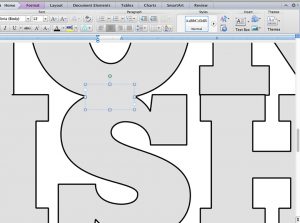
Step 4: Move the text boxes into position to create the word art design. Enlarge the view to 200% or larger to make the fine adjustments to the design. Use the arrows on the keyboard to nudge the type in small increments. |
|
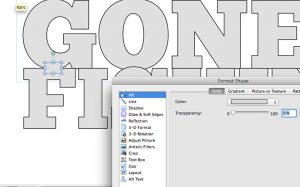
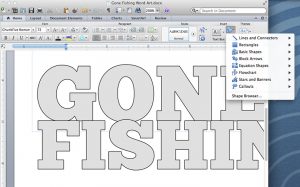
Step 5: Click the Insert a Shape icon and choose a standard rectangle from its kick-out menu. Draw a small box to cover the first area where two letters converge.
Go to Format –> Shape and fill this box with the same 15% Black fill as the text has. Remove any outline and the drop shadow from the shape (these were defaults in my program). Size the box to fit the letters by stretching the handles on the box. Copy that box and paste it onto the design. Slide that box to the next converging area and size it to fit. Copy, paste, and fit across the entire design until all voids are filled.
It’s a good idea to increase to screen image to 500% to make these fine adjustments. |
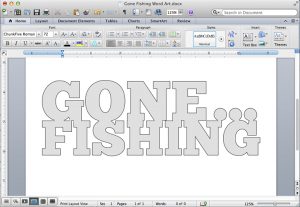 |
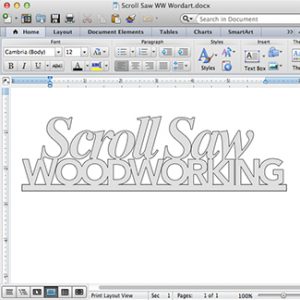
Step 6: Step back and admire the word art pattern. Remember to save the file! |