 Use this clever design in a scout’s Pinewood Derby® or as a working wooden car
By Troy Thorne
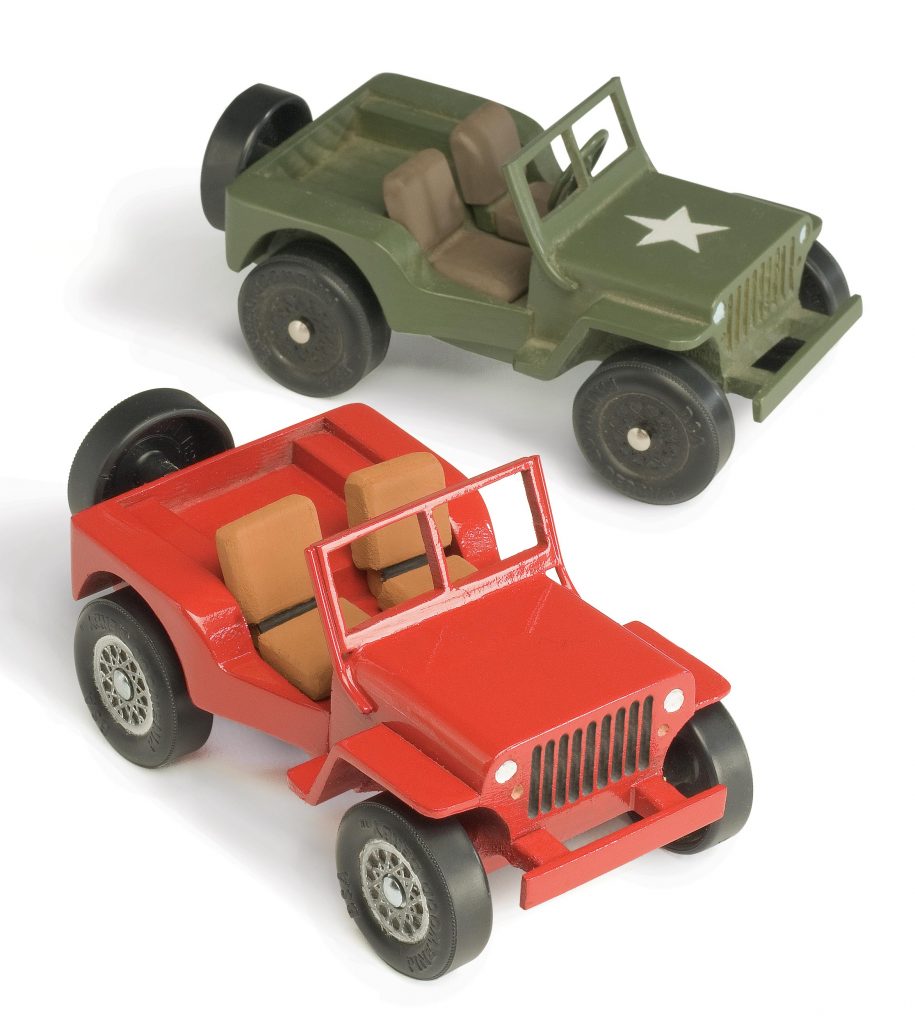
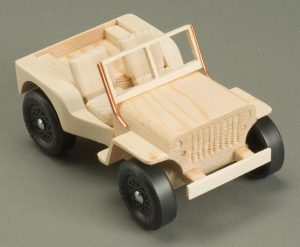
While designing diff erent cars for my son’s Pinewood Derby scouting event, I came up with the idea of a Jeep that meets the offi cial rules for the derby. If you don’t have a derby participant in your family, the bright colors and working design still make it a great toy for any age.
Despite its short wheelbase, this off – road Jeep meets the requirements of the Pinewood Derby. In Canada, the derby is called the Kub Kar®. No matter where you live, you should check with your local pack to ensure you are adhering to all the rules of the derby. To make the Jeep, you will need an extra wheel for the spare tire, and a bit of wire for the windshield. By adding the proper weights behind the seats, your Jeep can be a derby winner!
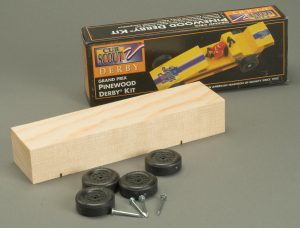 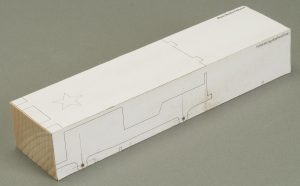 |
Set up the blank. Fold the pattern along the dotted line and attach the pattern to the blank with spray adhesive. Drill new axle holes where indicated on the pattern. Use a #44 drill bit. Set the wheels and axles aside for now. |
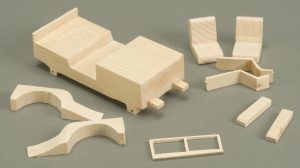 |
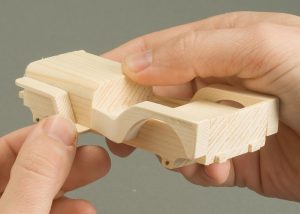
Cut the pieces. Be careful when cutting the thick wood of the Jeep body. Use a large scroll saw blade and do not force the wood into the blade. Round the edges of the hood and bevel the bottom edge of the windshield with sandpaper. |
  |
Attach the back fenders. Round the back corners and the wheel wells with sandpaper. Use the photo as a guide to properly align the rear fenders. Attach the fenders to the blank with cyanoacrylate (CA) glue. |
 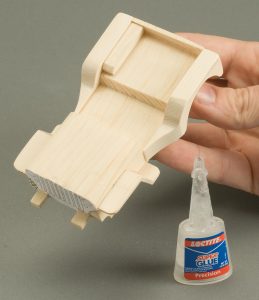 |
Attach the front fenders and inner wheel wells. Use CA glue to attach the front fenders. Then attach the wheel wells behind the seat area with CA glue. The wheel wells will hide the slight gap between the rear fenders and the body of the Jeep. |
 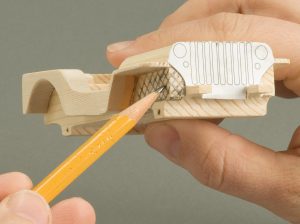 |
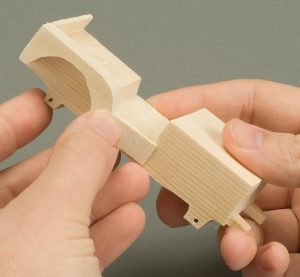
Shape the front. Attach the front-end pattern to the blank with spray adhesive. Remove the wood around the front axles (the shaded area) with a Dremel flexible shaft tool and a ball-shaped carbide rotary carving bit. |
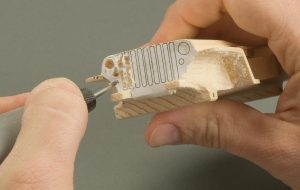 |
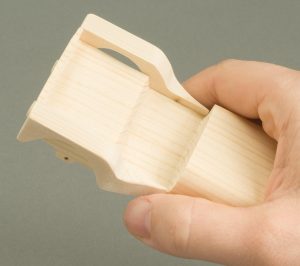
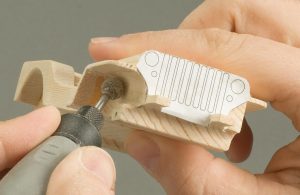
Shape the grill and headlights. Use a small, cylinder-shaped, high-speed cutter to carve the grill and headlights. The flexible shaft of the Dremel lets you hold and use the tool like a pencil, making it easy to carve the details. |
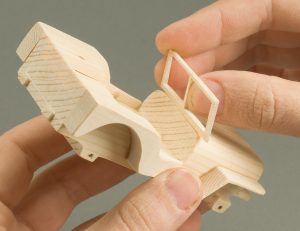  |
Attach the windshield. Apply CA glue to the bevel on the bottom of the windshield and position it on the hood. Cut two short lengths of copper wire, bend them to shape, and glue them to the sides of the windshield and hood for added support. |
 |
Attach the front bumper. Center the bumper and glue it in place with CA glue. Then add a bit more CA glue to the windshield-wire joint. The CA glue helps to build up the area between the wire and windshield to smooth the transition. |
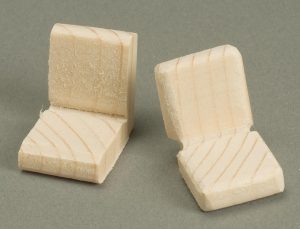 |
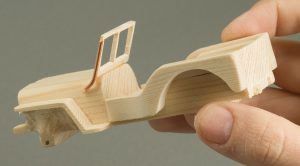
Shape the seats. Round the corners, and relieve away some of the wood at the bend to shape the seat cushions. Use a small, cylinder-shaped, high-speed cutter. Use CA glue to attach the seats and the rear bumper to the Jeep body. |
  |
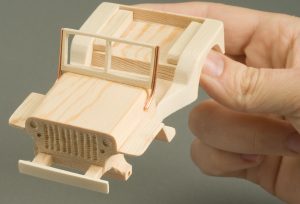
Dry assemble the wheels. Slide the axles through the wheels and carefully push them into the axle holes. Friction should hold the axles in place. Rotate the wheels to make sure they spin freely. Sand wood away from any areas where the wheels bind. |
Finishing
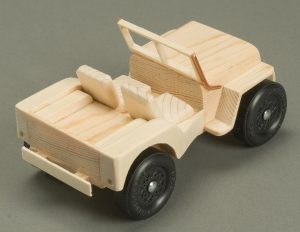
I prefer to paint the seats and Jeep separately before gluing the seats in place. I use matte brown paint for the seats to resemble leather, and a glossy red for the Jeep body. You can choose any color scheme you want. Cut a notch in the spare tire to accommodate the bumper and glue it in place with CA glue.
Tip: Sanding Sticks
Use spray adhesive to attach assorted grits of sandpaper to tongue depressors. These sanding sticks last forever and are handy when sanding small parts like the back fender supports.Sanding Sticks Tip
Materials:
• Wood of choice: Pinewood Derby kit, or 11/4″ x 13/4″ x 7″ (body)
• Wheel: 5 each 11/4″-dia. (if not using the kit)
• Nails: 4 each 3/32″-dia. x 1″ (axles, if not using the kit)
• Ground wire, copper: 4″ 14-gauge (windshield support)
• Sandpaper: assorted grits
• Spray paint: red
• Cyanoacrylate (CA) glue
• Acrylic paints of choice for the details
Tools:
• #9 skip-tooth blades or blades of choice
• Rotary power carver
• Rotary carving bit, carbide ball: 1/4″-dia.
• Cutter, high speed, small: cylinder-shaped
• Assorted paintbrushes of choice