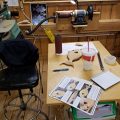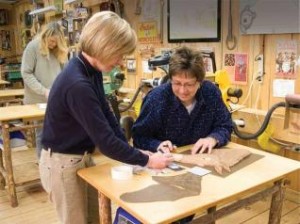
Students receive personalized attention while attending class at Judy’s shop in Seymour, Tenn. That’s Judy on the left.
The intarsia master answers frequently asked questions
Many people credit Judy Gale Roberts for reintroducing the art of intarsia to the public. Judy has devoted her life to creating intarsia designs and teaching others how to create intarsia masterpieces. She was one of the first ten people inducted into the Woodworking Hall of Fame because of her passion for teaching, designing, and creating intarsia.
In addition to creating intarsia patterns, Judy maintains an intense teaching schedule at her home studio in Seymour, Tenn. In this article, Judy shares her wisdom with SSW&C readers by answering some of the questions most commonly asked by students in her intarsia classes.
 Q. What is the best way to transfer the pattern to the different shades of wood?
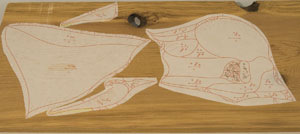
A. When I first started creating intarsia with my dad back in the 1970s we used carbon paper to trace each part onto the different shades of wood. This is a viable method, especially if you have a very large project. In the last ten years, the technique has changed. I use multiple copies of the pattern. Most projects will use around five copies. I cut each part that has a different color or grain direction from the patterns. I like to leave at least ¼” of excess paper around each pattern piece. This gives the pattern a little more staying power as you cut the parts.
Q. What kind of glue do you use to hold the pattern on the wood? 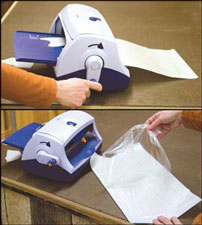
A. I started out using spray adhesive, but one of our students told us about the 3M repositionable glue stick. This is not your typical glue stick. It is not paste-like at all. Recently another student brought a sticker-making machine that works great. You place your pattern, right side up, in the slot then crank the handle and the pattern comes out the other end with clear acetate on top and adhesive on the backside of the pattern part. You peel the clear acetate off first. Then you can peel the pattern off of the nonstick paper and place it on your wood.
Q. Can you walk me through the sanding of an entire project?

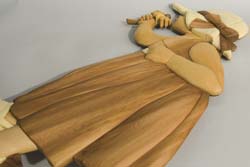
A. When I sand the little girl “Smell the Flowers” I sand the wood that she is standing on (the ground/shadow) first. To add even more dimension I taper the two pieces that make up the ground. They are thicker along the lower edge (about ½”) then taper down toward the top edge (about 1/8″). This will give the project a little more perspective. I use a pencil to mark adjoining parts as I sand the different levels. Next I sand the foot in the background. I taper the shoe in toward the dress and the foreground leg, to make those portions stand out a little more. I sand the leg in the foreground next, then the shoe. I stay above my pencil lines indicating the thickness of the pieces that join the part I am sanding.
I sand the arm holding the flower next. I sand the arm down to approximately ¼” where it joins the dress. At this point, sand the rest of the hand holding the flower. The face and neck would come next.
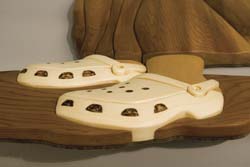
I sand the top of the hat next. To sand the three parts that make up the top of the hat more consistently I use some double-sided carpet tape to hold them on a piece of plywood cut approximately the same shape. This works great to temporarily hold parts together to sand them as a unit. Next I rough in the dress. Then move on the top floppy portion of the hat followed by the bow.
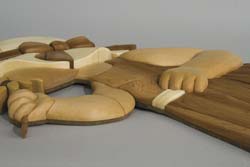
The last section to sand is the arm in the foreground. I sand the shoulder to elbow section first, then the forearm. The hand has a ¼”-thick raising shim placed underneath the part to give it more dimension. I sanded the wrist portion down to match the thickness of the forearm. The hand is the thickest part of the whole project, and the last part to sand.
Q. What is the finest grit sandpaper you use after everything is sanded and shaped.
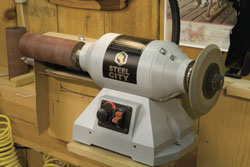
A. I use a variety of grits. After everything is roughed in I go back and start sanding the parts with the grain. I’ll go over the surface with a 180 grit sleeve on the sander. The last sander I use has a 220 grit sleeve on it. I do not have to do a lot of hand sanding. I do not round heavily between parts, unless I want to emphasize the cut line, such as wrinkles in clothing.
Q. What type of finish do you use? Do you put the finish on after you glue the parts down?
A. I use polyurethane in a gel form. It is very easy to use although it has a few drawbacks. The best thing about it is you easily have an excellent professional finish on your projects. The downside is the time it takes to dry and it is close to the consistency of pudding. Therefore, if you put the finish on after the parts were glued down you would have an extremely hard time keeping the finish from building up between the parts. I apply three coats; the first coat is applied to the surface and all the sides. Do not to apply the finish to the backside of the parts. The glue will not bond as well. The second and third coats are applied only to the exposed areas.
See more tips from Judy Gale Roberts in Scrollsaw Woodworking & Crafts Summer 2009 Issue #35.