Wire joints let these ornaments dance and play
By Ruth Chopp
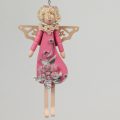
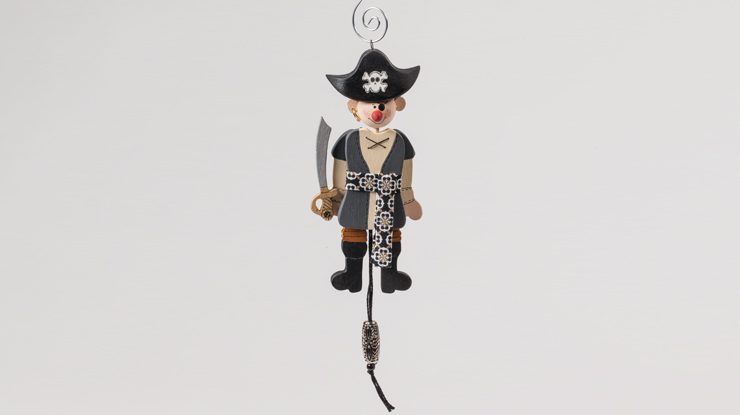
Why do ornaments have to just hang on the tree? I prefer ornaments, like this pirate and his angel friend, that move. Wire joints and a pull cord make this easy.
Making the Pirate
| Step 1: Transfer the patterns for all of the pieces (except the pirate’s hat) to the wood, drill the indicated holes and any blade-entry holes, and cut the pieces. There are no holes in the pirate’s left hand and left ear. |
| Step 2: Put the pattern for the bottom of the hat on the wood and drill the hole. Then, cut the hat according to the pattern. Sand the hat to a point on each side. |  |
| Step 3: At the top back of the body, draw an X to connect the four holes. Following the lines, carve shallow crossing grooves with a rotary tool and small bit. The grooves will keep the wires from impeding the movement of the arms. | 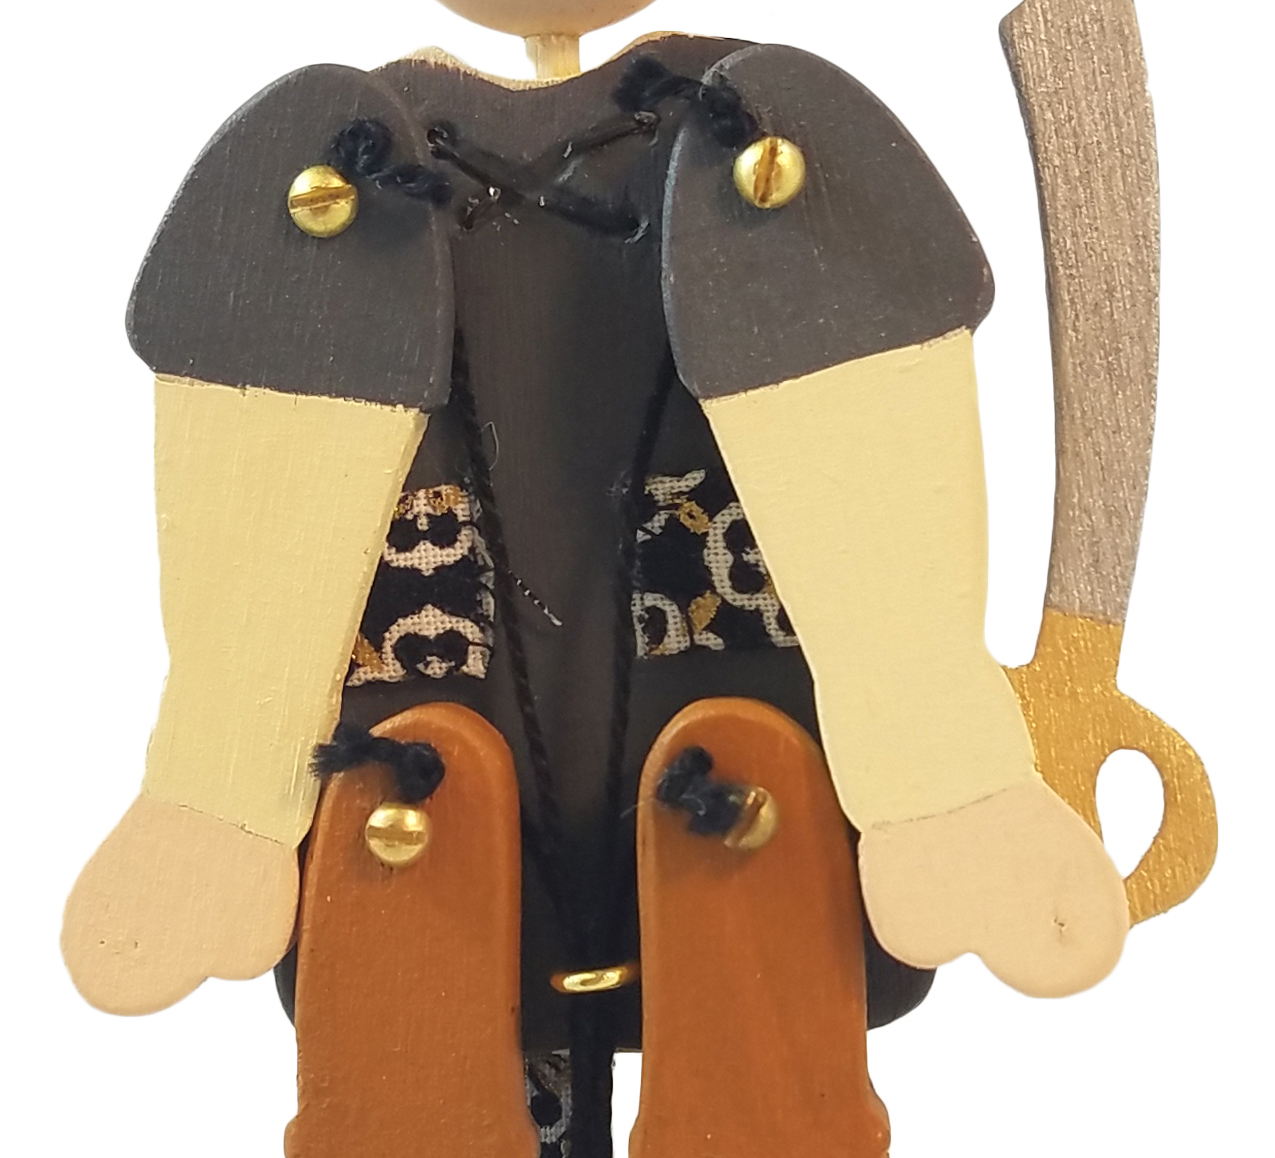 |
| Step 4: Paint the pieces, referring to the chart or using your choice of colors. Align the shirt paint pattern with the holes in the front body to make it easy to paint the open coat. Use a micron pen to add the detail lines. Cut the Jolly Roger artwork from the pattern page and glue it to the front of the hat. Apply clear spray finish to all of the pieces. | 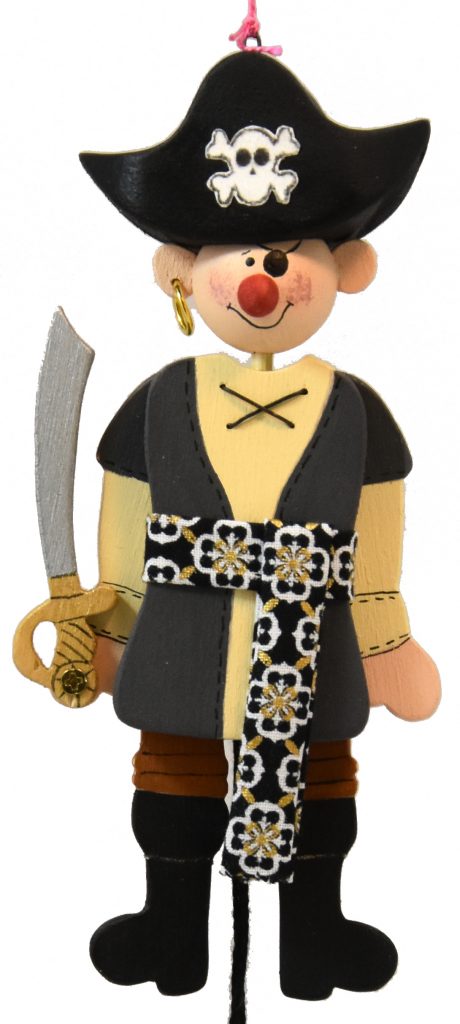 |
| Step 5: Cut black #28 wire into two 1-1/2″ (3.8cm) lengths. Feed the wires through the coat, crossed, to form the shirt accent. Bend and glue the ends into the previously carved grooves. |
| Step 6: Use a #2 by 1/4″ (6mm)-long wood screw to attach the cutlass to the right hand. |
| Step 7: Cut four 8″ (20.3cm)-long pieces of cotton string. Thread each one through the top hole of an arm or leg, and knot the string on the back of each limb. Use #2 by 1/2″ (1.3cm)-long round-head wood screws to attach the arms and legs to the back side of the body using the bottom hole on each limb. | 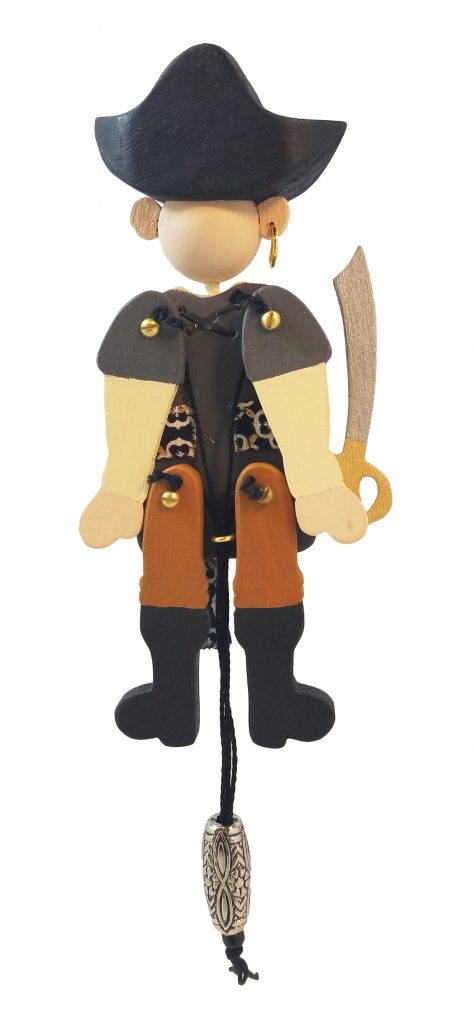 |
| Step 8: Add a screw eye to the bottom hole on the back of the body. Feed the strings through the screw eye and through both beads. Knot them together about 4″ (10.2cm) below the body to hold the beads in place. |
| Step 9: Glue the hat, nose, and neck to the head. Use a toothpick as a peg to glue the ears to the head. Add a gold ring to the right ear and a wire hanger to the top of the hat. Glue the neck into the body. |
| Step 10: For the waistband and sash, cut the fabric from the patterns. With the wrong sides together, fold in the sides and bottom of the longer piece (sash) and stitch or glue them in place. Repeat the process for the short piece (waistband). Fold the sash around the waistband, and then wrap the waistband around the body. Glue one end of the waistband to the back of the body, position and glue the sash, and then glue the other end of the waistband. |
Paint Guide
1 DecoArt Americana
2 Delta Ceramcoat
3 Plaid FolkArt
- Hat, shoes: ebony black (1)
- Pants: raw sienna (1)
- Shirt: ivory (2)
- Coat: hippo gray (2)
- Head, hands: fleshtone (2)
- Cutlass blade: sterling silver (3)
- Cutlass handle: pure gold (3)
- Nose, cheeks: tomato spice (2)
- Detail lines: black micro pen
Materials:
- Baltic birch plywood, 1/4″ (6mm) thick: assorted scraps
- Baltic birch plywood, 1/8″ (3mm) thick: assorted scraps
- Basswood, 1″ (2.5cm) thick: 1-1/4″ x 2-1/4″ (3.2cm x 5.7cm)
- Wooden ball, 7/8″ (2.2cm) dia. (head)
- Wooden ball, 1/4″ (6mm) dia. (nose)
- Dowel, 1/8″ (3mm) dia.: 1″ (2.5cm) long (neck)
- Toothpick
- Fabric: 1″ x 7-1/2″ (2.5cm x 19.1cm)
- Micron pen: black
- Large bead: silver
- Small bead: black
- Cotton string, #5: 32″ (81.28cm)
- Glue: E6000
- Jewelry jump ring, 5/16″ (8mm) dia: gold (earring)
- Flat-head wood screw, brass #2: 1 each 1/4″ (6mm) long
- Round-head wood screws, brass #2: 4 each 1/2″ (1.3cm) long
- Screw eye: 3/16″ (5mm) dia.
- #28 wire, black: 3″ (7.6cm)
- Finish: clear spray
- Acrylic paint: see Paint Guide
Tools:
- Scroll saw blades, #3 reverse tooth
- Drill with bits: 3/4″ (19mm) dia., 1/8″ (3mm) dia., 15/64″ (5.9mm) dia.; #35, #44, #56 wire size
- Sander
- Screwdriver
- Paintbrushes
- Needle and thread (optional)
Pirate Pattern
Click here to download the pattern.
About the Author

Ruth Chopp began her career as a home economics teacher. When her children left home, she decided to try woodworking, noting that using a scroll saw and a sewing machine are really quite similar. Ruth loves wooden Christmas tree ornaments, so she designed her own; she now has about 300 patterns. Contact Ruth via e-mail at melchopp@comcast.net.

For more fun scroll saw projects, subscribe to Scroll Saw Woodworking & Crafts magazine. To receive patterns, articles, and updates in your e-mail inbox, subscribe to our FREE newsletter.