Customize your Pinewood Derby car with a variety of options
By Troy Thorne
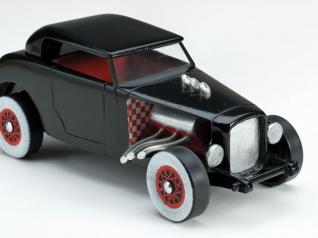
This project can be built as a racing Pinewood Derby® car, meeting all of the official rules, or you can build it as a toy and use the wooden wheel pattern. Just like a real hot rod, you have the choice of many options, including an exposed engine, a complete interior, and a removable hardtop.
Customize your ride to take home best of show, or simplify the project and help your child or grandchild complete the car as their first scroll saw project.
Start by cutting the block to size. I use a knot-free piece of a pine 2×4. If you purchase a Pinewood Derby kit, you will need to glue a 1/4″ by 13/4″ by 7″ piece of wood to the top of the blank.
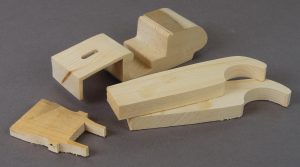 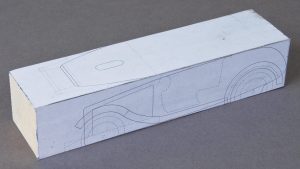 |
Cut the primary pieces. Fold the patterns along the dotted lines and attach patterns A, B, and C to the appropriate stock. Drill axle holes in the main body and front frame with a #44 drill bit mounted in a drill press. Cut the main body, the body sides, and the front frame. Cut the interior and hood opening if desired. |
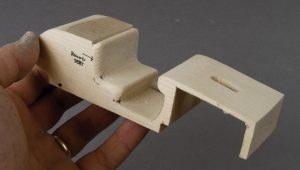 |
Sand the pieces. Cut the windshield groove on the main body. Remove the patterns and sand any rough edges on all four pieces. If you cut the optional interior, round the corners of the bench seat with sandpaper and sand the other interior surfaces, including the floor and dashboard. |
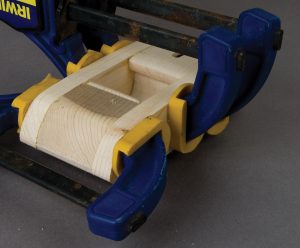 |
Glue the body sides to the main body of the car. Carefully align both body sides with the main body and glue them in place with wood glue. Clamp the sides in place and allow the glue to dry thoroughly. |
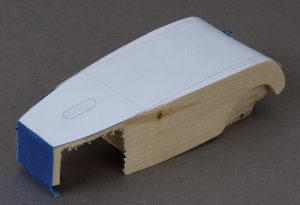 |
Taper the front of the car. Cover the top of the car with painter’s tape. Attach pattern D to the top of the car, aligning the pattern with the front edge of the blank. Cut along the solid pattern lines. |
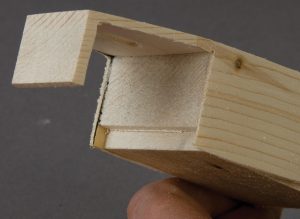 |
Clean up the fire walls. Trim the excess wood on the body sides even with the fire wall in the hood opening area. Do not cut the body sides at the notched area on the bottom of the fire wall. The sides should form end caps on the notch. You only need to do this step if you cut the area for the exposed engine. |
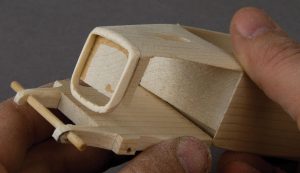 |
Add the front frame and grill. Cut the grill and attach it to the front of the car with cyanoacrylate (CA) glue. Drill 1/16″-diameter holes in the front frame and glue a 1/16″-diameter dowel through the holes. Glue the front frame below the engine compartment, aligning the back with the notch on the main body. Sand the car and round the top edges of the car and front edges of the grill. |
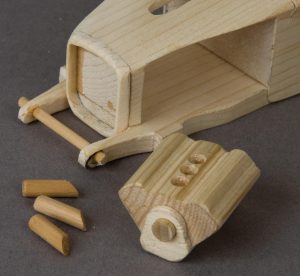 |
Make the engine. Cut the engine block and engine covers. Drill the holes for the engine intakes and the headers. Bend plumber’s solder to create the headers. If the headers are loose, smash the ends of the solder to make them fit tightly into the holes. Glue the dowel into the front engine cover and glue both covers in place. Do not glue the intakes or headers in place until the engine is installed after the car is painted. |
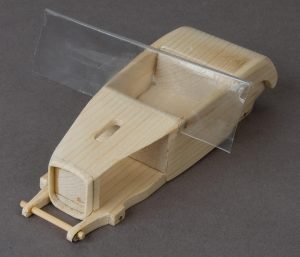 |
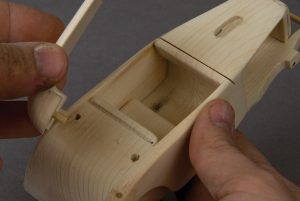
Build the windshield. Use plastic sheeting from discarded packaging material. Extend the windshield groove created in step 2 though the side panels of the car. Place the plastic into the groove and mark the width. Trim the sides with scissors. Cut the windshield so it extends 3/8″ to 1/2″ above the top of the car. If you are adding the hardtop, trim the height of the windshield after you fit the top. |
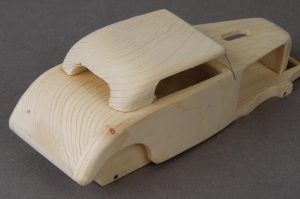  |
Create the optional hardtop. Fold pattern E on the dotted line and attach it to the stock. Cut the top and then round the corners with sandpaper. You can carve in a rear window with a drum sander and a rotary power carver. Drill matching 1/16″-diameter holes in the top and body, and use 1/16″-diameter dowels to join the pieces. For a removable top, do not glue the dowels in place. |
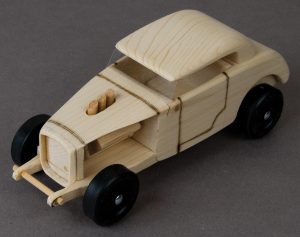 |
Dry assemble the car. Test the fit of all of the pieces. If adding the optional hardtop, trim the windshield to fit under the front of the hard top. Add the panel lines to show the hood edges and doors if desired. Pencil the lines in and then use a woodburner to trace the lines. You can add rear tail lights by drilling 3/16″-diameter holes in the rear edge of the body. |
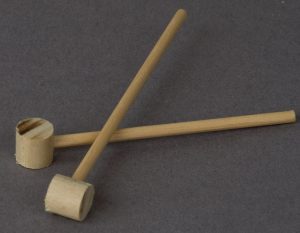 |
Create the headlights. Drill a 1/16″-diameter by 3/16″-deep hole into the side of a 3/8″-diameter dowel rod, 3/16″ from the end of the dowel. Insert a 1/16″-diameter by 4″-long dowel into the hole. Cut the 3/8″-diameter dowel to 3/8″ long. Repeat the process to make a second headlight. |
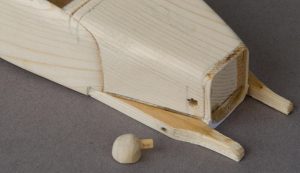 |
Finish the headlights. Round one end of the 3/8-diameter dowel with a sander to create the back of the headlight. Cut the 1/16″-diameter dowel to 3/16″-long. Drill 1/16″-diameter holes in the front edges of the hood and glue the headlights in place. |
Materials:
•Knot-free piece of a pine 2×4: 11/2″ x 13/4″ x 7″ (or Pinewood Derby kit blank with additional 1/4″ x 13/4″ x 7″ piece of pine)
• Pine: 1/4″ x 13/4″ x 21/2″ (front frame)
• Pine: 2 each 1/2″ x 11/2″ x 53/4″ (sides)
• Pine: 3/8″ x 11/4″ x 6″ (wheels, or use wheels from kit)
• Nails: 4 each 3/32″-dia. by 1″ (axles, or use nails from kit)
• Pine: 5/8″ x 17/8″ x 21/2″ (optional hardtop)
• Dowel: 1/16″-dia. by 12″-long
• Dowel: 3/8″-dia.by 5″-long
• Scrap plastic (windshield)
• Plumber’s solder (engine headers)
• Pine: 1″ x 1″ x 13/16″ (engine block)
• Wood scraps: 1/8″-thick (engine covers)
• Dowel: 3/16″-dia. by 12″-long (engine intakes)
• Painter’s tape
• Spray adhesive
• Cyanoacrylate (CA) glue
• Wood glue
• Sandpaper: assorted grits
• Acrylic paints of choice for the details
• Spray paint & primer of choice
Tools:
• #9 skip-tooth blades or blades of choice
• Drill with #44, 1/8″-, 1/16″-, and 3/16″-dia. drill bits
• Forstner bit: 5/8″-dia. (wooden wheels)
• Wood clamps: 12″
• Rotary power carver (window in hard top)
• Miniature sanding drum (window in hard top)
• Assorted paintbrushes of choice
CLICK HERE to download the Hot Rod Racer Pattern.
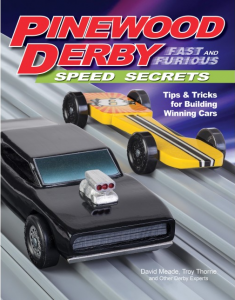 |
Read Pinewood Derby Fast & Furious Speed Secrets by David Meade and Troy Thorne for more Pinewood Derby tips and tricks. It is available from www.foxchapelpublishing.com for $12.99 plus S&H. |
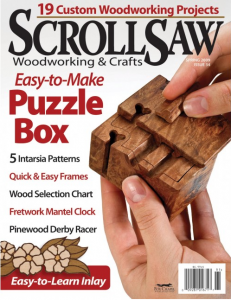 |
For complete step-by-step assembly instructions see Scroll Saw Woodworking & Crafts Spring 2009 (Issue 34). |


