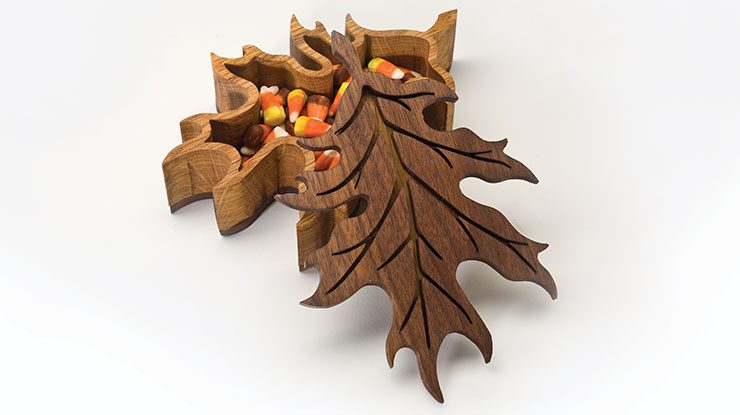
Celebrate Autumn with this easy-to-make keepsake box
By Thomas Haapapuro
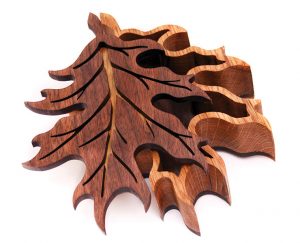
Download the PatternThis box reminds me of the flutter of leaves falling to the ground in the fall. Like many of my designs, this box draws its inspiration from nature, in particular, the leaf of a red oak tree. To develop this pattern, I photocopied a well-proportioned leaf from my backyard tree. Then, with a sheet of tracing paper over the copy, I refined and revised the pattern into a smooth distinctive shape. The inside veins of the leaf are reminiscent of a tree themselves, and give a nice suggestion of the whole concept of a red oak tree.
Because this box is a celebration of the mighty oak, it is only appropriate to use oak as the predominant wood. The oak from this box is actually from a large 100-year-old barn that was going to be torn down to make way for a subdivision. I have used the wood from this barn in a lot of projects over the years, and have kept a little history of the farm alive, as well as having a great story to go along with each project.
Wood Selection
Red oak, though a beautiful wood, has a distinct drawback you must take into consideration. Because of the straightness of the grain, red oak is likely to break in fragile areas. To minimize this, always slow your momentum coming out of a cut and use your fingers to add pressure to the wood in fragile areas to give it additional support.
The wood may also break if the blade becomes bound and tries to bounce the workpiece. Minimize this risk by cutting slow and steady and by applying constant firm downward pressure on the wood.
I use 1 1/2″ (3.8cm)-thick red oak for the box sides. You can use two 3/4″ (1.9cm)-thick boards to achieve this thickness. Laminate the boards before cutting. Accent the box using 1/4″ (6.4mm)-thick black walnut for the bottom and the lid.
Note: For saws not capable of cutting 2″ (5.1cm)-thick wood, cut the main box sides blank separately from the stacked lid and bottom or reduce the thickness of the box sides blank.
Getting Started
 |
Step 1: Assemble the stack. Secure the 1/4″ (6.4mm)-thick bottom and lid blanks on opposite sides of the 1 1/2″ (3.8cm)-thick box sides blank with double-sided tape. To make sure the tape bonds securely, clamp the stack together for at least five minutes. Cover the bottom of the blank with clear packaging tape. Attach pattern A to the stack with spray adhesive. |
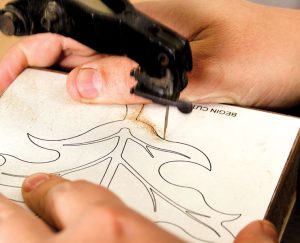 |
Step 2: Cut the perimeter. Use a blade designed for cutting thick wood, such an Olson thick-wood blade. Start at the stem and cut around the perimeter of the box. Cut slow and make sure the blade remains square to the table. |
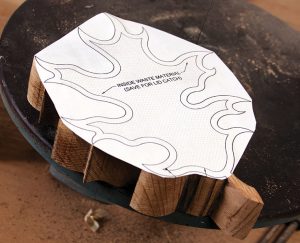 |
Step 3: Separate the stack. Use a sharpened putty knife to separate the three layers. Attach pattern B to the box sides blank with spray adhesive. Hold the piece up to a window or lamp so you can see the silhouette of the box against the lines of the pattern. Align the points on the pattern with the points on the box sides blank. |
Cutting and Finishing
 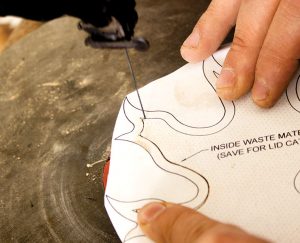 |
Step 4: Cut the box body. Drill a blade-entry hole where indicated on the pattern. Use the smallest drill bit your blade will allow. Cut slowly along the inside pattern line. Make sure the blade does not bulge or shift out of square. The waste section is used for the lid backer, so keep the waste section whole. |
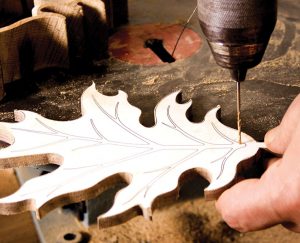 |
Step 5: Cut the lid. Drill a blade-entry hole and cut the vein details on the lid. Be careful as these cuts may cause the lid to become fragile. We will strengthen the lid with a backing board. |
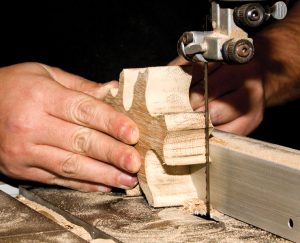 |
Step 6: Cut the lid backing. Set the band saw fence to make a 3/16″ (5mm)-thick slice. Rip a slice from the waste wood cut in step 4. Cut slowly and keep the wood pressed down to the table and against the fence. Alternatively, use a hand saw to cut off a 3/16″ (5mm)-thick slice. |
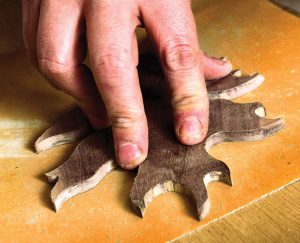 |
Step 7: Sand the pieces. Attach a sheet of sandpaper to your workbench with double-sided tape. Gently sand both sides of the bottom, the lid, and the lid liner. The sandpaper attached to the flat surface minimizes the risk of rounding over the edges of the blanks. Smooth the inside of the box sides with sandpaper. Work progressively through the grits. |
 |
Step 8: Assemble the lid. Place the lid face down on the workbench. Position the box sides on top of the lid. Spread glue evenly across the top of the lid backing and place the backing, glue-side down, into the open area in the box sides. Press the backing onto the lid for a few minutes, making sure the box sides section is still aligned with the lid. Then carefully remove the box sides. |
 |
Step 9: Clamp the lid backing to the lid. Sandwich the lid and backing between two pieces of scap wood. Clamp the boards tightly together to secure the lid to the lid backing. Use two more scrap boards to glue and clamp the box bottom to the box sides. |
 |
Step 10: Finish the box. Place the lid in place and sand any areas that don’t fit properly. Apply a generous coat of oil/varnish mix, such as Maloof oil/varnish mix, to all of the areas of the box and allow it to sit for 10 minutes. Remove any excess oil with a clean lint-free cloth. Use compressed air to blow any excess oil out of the veins on the lid and remove the excess oil with a clean cloth. Sand gently between coats and apply additional coats until you reach your desired luster. |
Materials:
• Wood, such as walnut: 2 each, 1/4″ x 5 3/4″ x 8″
(6.4mm x 14.6cm x 20.5cm), lid and bottom
• Wood, such as oak: 2 each, 3/4″ x 5 3/4″ x 8″
(1.9m x 14.6cm x 20.5cm) or 1 1/2″ x 5 3/4″ x 8″ (3.8cm
x 14.6cm x 20.5cm), box sides
• Tape: double-sided
• Spray adhesive
• Sandpaper: assorted grits
• Wood glue, such as Tightbound II
• Finish, such as Maloof oil/varnish mix
Tools:
• Scroll saw blades: thick-wood blades or blades of choice
• Clamps
• Drill with bits: assorted small
• Band saw or hand saw
About the Author
Thomas Haapapuro is a self-taught woodworker and sculptor who draws upon his education and experience as a landscape architect to fuse the organic shapes of nature with the pattern and balance of contemporary architecture. Thomas lives and works in Charlotte, N.C. For more of his work, visit thaapdesigns.com.
 |
• Get the current issue! Purchase the Issue• For more articles like this, subscribe to Scroll Saw Woodworking & Crafts magazine. • Plus! Get digital mini magazines in your e-mail between printed issues. Subscribe to our free e-newsletter, Short Cuts.
|