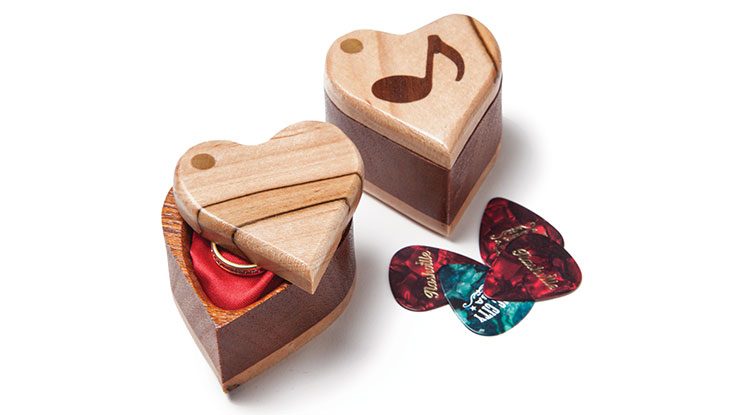
Easy-to-make box is perfect for a special gift
By Albert Baggetta
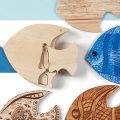
I originally built these boxes in the shape of guitar picks to make a unique place to store my picks. Then I added a curve here and there, and ended up with boxes that looked like little hearts. These are more universal and make nice gift boxes for Valentine’s Day and other special events. They are easy to make, and you can decorate them by adding an inlay to the top with any wood of your choose—including maple and redheart.
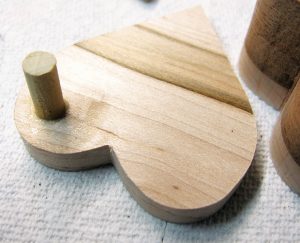
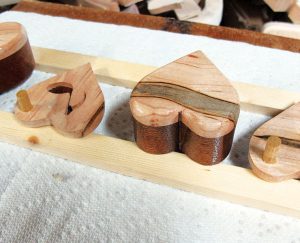
Selecting the WoodI use a light wood with an attractive grain for the tops and bottoms of my boxes. Ambrosia maple is one of my favorites—I think the grain is oddly attractive. For the bodies of my boxes, I use a dark wood, such as walnut, to create a contrast. Use slightly oversized blanks so you can choose the best areas of grain. I make three or four boxes at a time, so I select pieces of wood big enough to fit several patterns. The photos show several patterns in progress, but the instructions are for a single box. |
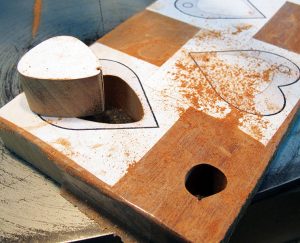
Getting StartedCover the top of the body blank with clear packaging tape. Attach the body pattern to the tape with spray adhesive. Make sure the blade is square with the table. |
Cutting the PiecesStep 1 Drill a blade-entry hole to cut the center of the box body. Use a 1/16″ (2mm)-diameter bit. Cut the inside of the box body with a #5 blade. |
 |
| Step 2
Apply wood glue to one side of the body blank. If glue gets inside the body opening, remove it with a paper towel wrapped around your finger. Place the glued surface on the bottom blank. Place a heavy weight on the body blank or clamp it tightly until the glue dries. |
 |
| Step 3
Cover the top blank with clear packaging tape. Attach the top pattern, arranging it so the top has an attractive grain pattern. Cut the top. Add an inlay to the lid. |
 |
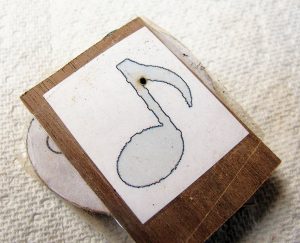
Adding and InlayThe grain of the wood is often enough to make a heart box attractive, but you might want to decorate the top by adding a simple wood inlay. 1. Choose the inlay wood. Pick wood that contrasts with the lid. Cover the wood with packaging tape and attach the pattern (I’m using a music note). Place the inlay on top of the lid and tape them together. Drill a 1/16″ (2mm)-diameter blade-entry hole somewhere that will be easy to disguise (such as the inside point of the flag on the music note). |
 |
| 2. Tilt the saw table to the left about 4°. Cut a test circle in a stack of scrap wood the same thickness as the lid and inlay stack. Adjust the angle until the top piece of scrap protrudes slightly from the other piece. Then, cut the inlay in a counterclockwise direction (see the arrows in the photo). | 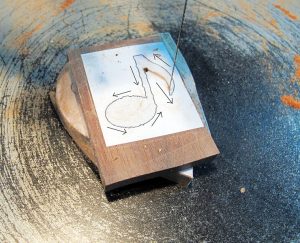 |
| 3. Separate the stack and remove the tape. Mark the dowel hole in the top and remove the pattern. Apply glue to the edges of the inlay and press it into place. | 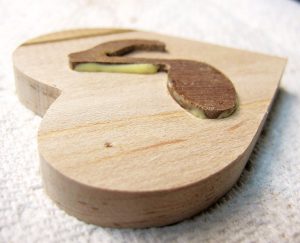 |
| 4. Mix sawdust from one of the woods with glue to make a paste. Use a toothpick to pack the paste into the visible blade-entry holes and any other gaps. Allow the glue to dry, and then sand the top smooth with a belt sander. Wear gloves to protect your fingers. | 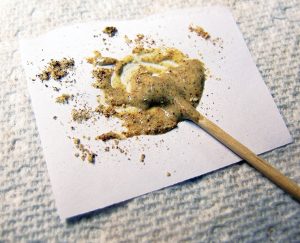 |
| Step 4
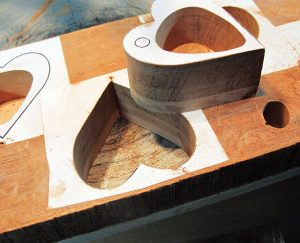
On the body, drill a blade-entry hole at the point of the heart. Insert a #9 reverse-tooth blade and cut the perimeter of the box. Don’t force the blade, which will angle the cut. |
 |
| Step 5
Place the lid on the box. Align the edges as much as possible, and secure it with packaging tape. Set the drill press to drill 1/4″ (6mm) into the body. Then, drill a 1/4″ (6mm)-diameter hole through the lid into the body. Remove the tape. If you are making multiple boxes, keep the lids with the matching boxes. |
 |
| Step 6
Cut the dowel to length. It should fit through the lid into the body and protrude a little bit. Glue the dowel into the lid, making sure it protrudes a small amount. When the glue is dry, use a belt sander to smooth the lid. Trim the dowel as needed so the lid sits flush with the sides. |
 |
Finishing the ProjectStep 7 Round the edges of the box. Use a router table with a roundover bit. Then, open the box and round the inside edges of the opening. Buff the box with a sanding mop or hand-sand it. |
 |
| Step 8
Apply a clear sealer to the box and lid. I apply two coats. If the box feels rough, buff it with fine steel wool. |
 |
| Materials
• Dark wood, 3/4″ (1.9cm) to 1″ (2.5cm) thick: body, 3″ (7.6cm) square • Light, figured wood, 1/4″ (6mm) thick: top & bottom, 2 each 3″ (7.6cm) square • Dark wood, 1/4″ (6mm) thick (optional): inlay, scraps • Dowel, 1/4″ (6mm) dia.: 1″ (2.5cm) long • Spray adhesive • Tape: clear packaging • Sandpaper • Wood glue • Wood sealer, such as Ace premium enamel: clear gloss |
Tools
• Scroll saw blades: #5, #9 reverse-tooth • Drill press with bits: 1/4″ (6mm) dia., 1/16″ (2mm)-dia. twist • Router table with bit: small roundover • Sanders: belt, mop • Clamps |
 |
Purchase our spring issue!
Purchase Our Spring Issue Here!
For more articles like these, subscribe to Scroll Saw Woodworking & Crafts magazine. SubscribePlus! Get mini magazines in your e-mail between printed issues with Short Cuts, our e-mail newsletter. |