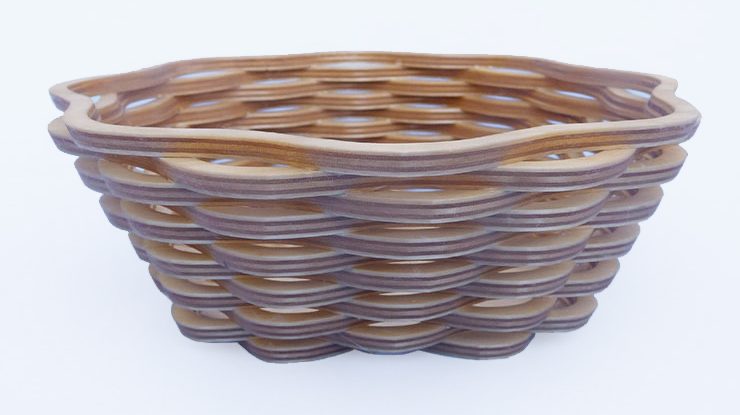
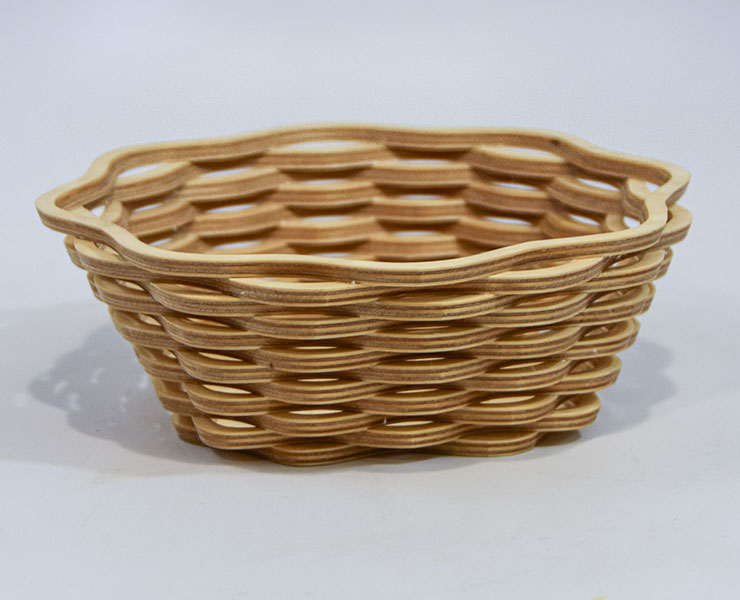
Store treasures in this stylish stacked vessel
By Dave Van Ess
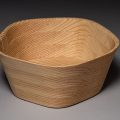
Baskets are a lot like bowls, but in my opinion, they’re a little less intimidating. I designed this basket to be a welcome challenge for scrollers of every skill level. It can even be completed in one afternoon. You’ll notice that the shape is squarer at the base and becomes rounder near the top. This gradual change from one shape to another is called morphing. It is a technique that allows for many interesting basket and bowl shapes, which you can apply to future designs.
Getting Started
Copy the patterns and transfer them to the plywood; I used graphite paper and a pencil, but you can attach them with repositionable spray adhesive. Prepare a drill angle guide and a blade angle block to make angled cuts on the scroll saw.
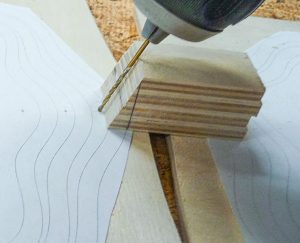
TIP: Creating Shop-Made Angle Guides
| Glue up four equal-sized pieces of 1/2″ (1.3cm) plywood for the blade angle block. Draw a 90° line on the side of the block. Measure 5/8″ (1.6cm) up from the bottom end of the line, and then draw a line from that point to the top of the first line. This makes a guide to set your scroll saw at 18.2°.
To make the drill angle guide, set the saw using the blade angle block and make a straight cut through a scrap of 3/4″ (1.9cm) wood. Rest your drill bit along the angled end to drill 18.2° blade-entry holes. |
Making the Basket
Step 1
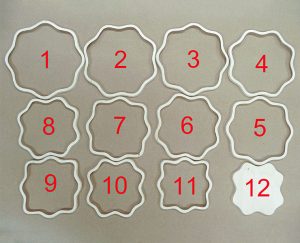
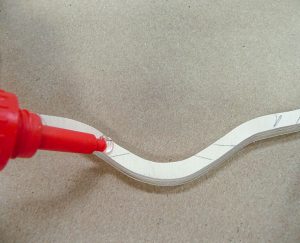
Cut the rings. This basket has 11 rings and a base for a total of 12 layers. They are all cut from four different patterns. Using a 1/16″ (2mm)-dia. bit, drill the 11 holes marked on the patterns. Then cut the rings and base. I used a #3 MGT blade. After cutting, hand-sand each ring with 180-grit sandpaper.
 |
 |
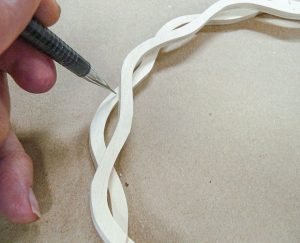
Step 2
Glue the rings together. Start with Ring #1, facedown, and place Ring #2 on top. Adjust the fit and use a pencil to mark where the rings intersect. Take Ring #2 off and apply a dot of cyanoacrylate (CA) glue on all 24 intersections. Place Ring #2 back in place, using the marks as a guide. Apply pressure until dry. Repeat this process for the remaining layers.
 |
 |
Step 3
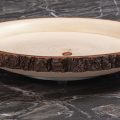
Leave the basket natural or add a food-safe finish. I recommend using Watco® Danish oil, making sure to get it into all of the nooks and crannies. Apply two coats. Let dry overnight.
 |
Materials
|
Tools
|
|
About the Author Dave Van Ess is a retired Engineer living in Chandler, Ariz. He has been scrolling for more than 30 years. He is the past president of Arizona Woodworkers (a greater Phoenix area woodworking club), and volunteers his time and resources to provide projects for kids. |
 |
Purchase our summer issue!
Purchase Our Summer Issue Here! For more articles like these, subscribe to Scroll Saw Woodworking & Crafts magazine. Plus! Get mini magazines in your e-mail between printed issues with Short Cuts, our e-mail newsletter. |