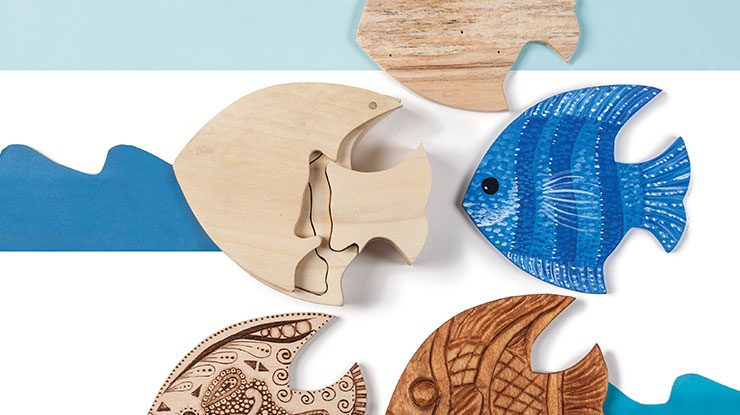
Use stains to create a box inspired by a colorful tropical fish
By Bill Miller
It takes a piece of wood smaller than a brick and a little time to make a different and beautiful fish puzzle box. For me, the whole thing started because I had something small that I wanted to give to someone and I didn’t want to just put it in a bland box. I didn’t have any exotic wood to use so that option was out. I knew I wanted to make something that they would keep long after the gift was given and hopefully it would remind them of what was in the box forever.
Being an avid scuba diver, I thought that a fish would make an interesting form to use to make my box. The top could open to reveal the chamber and an interlocking tail would keep it closed was my starting point. One thing led to another and soon a simple idea turned into a project that I thought would be of interest to other woodworkers because of the many options that the build offers for customizing it to your skill level, need, and imagination.
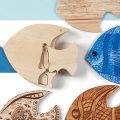
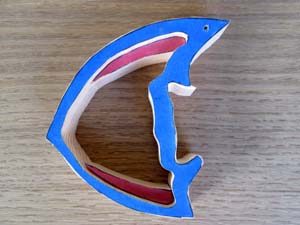
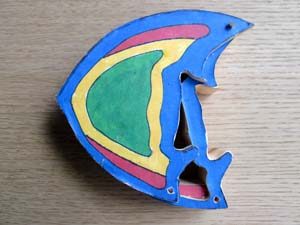
In this article, I color coded my patterns and put them back on cut pieces for the sake of illustration. You will not have to do this. You will be instructed when a part of the pattern needs to be reaffixed to make additional cuts.
Getting Started
Choose a piece of wood with a fine grain. Cover the top of the blank with contact paper and attach the fish pattern using spray adhesive. Make sure the grain runs parallel with the fish’s body.
Making the Fish Box
 |
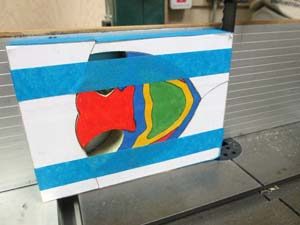
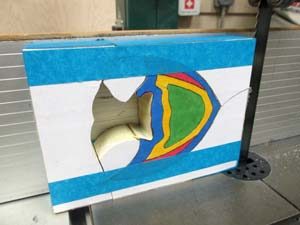
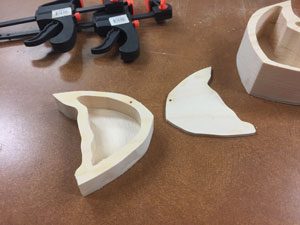
1: Cut around the perimeter of the fish (Line A). Cut as shown with a band saw with a 1/4″ (6mm)-wide blade to preserve the white scrap pieces, which will be used to safely secure the fish for two future cuts. |
 |
2: Use tape to secure the fish within the scrap pieces. Using the largest band saw blade available to you to avoid blade drift (3/4” or 19mm if possible), set your fence and slowly rip 1/8″ (3mm) from the bottom of the fish. This will become the bottom of the box; set it aside for now. |
 |
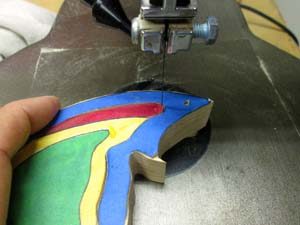
3: Cut the red tail from the body (Line B). Use a scroll saw with a #5 blade (I use FD Ultra Reverse). Set it aside for now. |
 |
4: Use tape to secure the fish within the scrap perimeter pieces. Set the band saw fence to 1/4″ (6mm) and use the large band saw blade to rip 1/4″ (6mm) off the top of the fish for the lid. Set it aside. I make the lid 1/4″ (6mm) thick because a thinner lid is likely to warp. |
 |
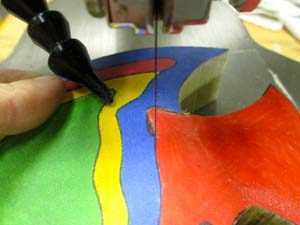
5: Attach a copy of the fish to the body. Use the #5 blade in the scroll saw to carefully cut the inner fish from the body wall (Line C). |
 |
6: Cut 1/8″ (3mm) off the top of the inner fish section. Use the band saw. NOTE: Orient and cut this piece as indicated in the photo. Do not try to cut it with the curved surface on the band saw table. This piece will be the cover for the fish cavity that you just created. Set it aside. |
 |
7: Attach another pattern to the remaining smaller fish. Cut off the two red fins with a scroll saw (Lines D and E). |
 |
8: Glue these two fins to the inside of the fish cavity as shown. They provide support for the inner box lid. |
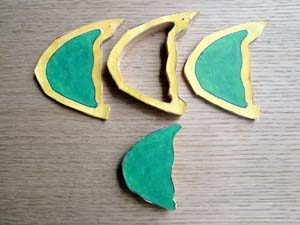 |
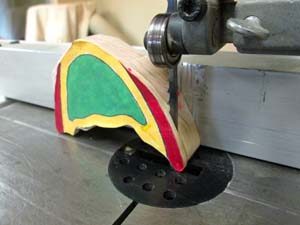
9: Cut 1/8″ (3mm) off the top of the smaller fish body. Use the band saw. Then, cut 1/8″ (3mm) off the bottom. Reattach a pattern to the center section and cut the green area (Line F) with the scroll saw to create the cavity in the second fish box. The smaller green fish could become another box, but I found it too small to work with safely. |
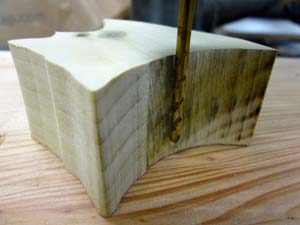 |
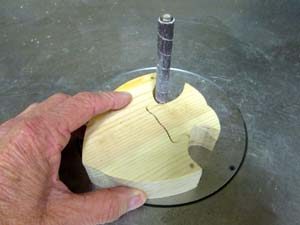
10: Set the drill press to drill most of the way through the tail. Use a 1/8″ (3mm) diameter bit. This hole will be for the 1/8″ (3mm) diameter dowel that will be the puzzle box’s key. The dowel should protrude 1/4″ (6mm) out the bottom of the top tail piece after you rip the tail piece in Step 11. |
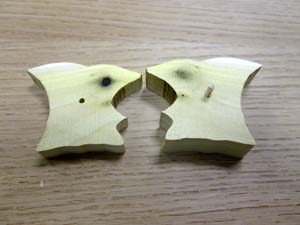 |
11: Cut the tail into two unequal pieces. Use the band saw. Make sure that the top tail that wasn’t drilled all the way through is the larger piece. Glue a 1/8” (3mm) diameter dowel into this larger piece leaving about 1/4” (6mm) exposed. Sand down the exposed tip of the dowel to a smaller diameter so that it fits easily into the bottom tail piece. This dowel protrusion is the key that will be used to open two of the puzzle box’s secret locks. Glue the smaller half of the tail to the box bottom. |
 |
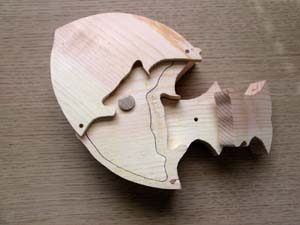
12: Drill a 1/8″ (3mm)-diameter hole in the corner of the fish and fish body. Make the hole 1″ (25mm) deep. This will allow the top of the fish box to pivot on a 1/8″ (3mm)-diameter dowel. The visible holes in the bottom fin are optional and will be used to lock the cover in place using another 1/8” (3mm)-diameter dowel. That will be explained later. The location for the pivot hole must be exact. If the hole isn’t out far enough the top will not completely clear the body cavity when it swings opens which will make the removal of the cavity cover you will make next difficult. |
 |
13: Glue and clamp the top to the smaller fish. This fish opens in the opposite direction as the outer fish (it opens from the underside. Drill a 1/8″ (3mm)-diameter hole in the top corner from the bottom up most of the way through the section. Do not let it breach through the surface of the inner fish. Insert the 1/8” (3mm)-diameter pivot point dowel. |
 |
14: Drill a hole and glue the handle dowel into the inner lid. Use the bottom part of the tail that’s already glued to the box bottom to help you position the assembled fish body and the box lid as you glue and clamp the assembly to the box bottom. Add the top part of the tail to help keep it in position. Allow the glue to dry and then make sure everything moves properly. |
 |
27: Sand the tops, bottom, and sides of both fish boxes. Use a disc circular sander. Use your oscillating spindle sander in the tight areas. |
Finishing the Fish Box
Apply a pre-stain treatment to the box. Then, apply your stain color of choice. You can use wood carving tools to bring the fish box to life. I carve the dorsal and pelvic spines with a wide V-tool and use a narrow V-tool for the pectoral and caudal fins. I use 1/2″ (13mm) plastic jewel for the eye.
Materials & Tools
Materials:
• Light wood, 1-1/2″ (3.8cm) thick: 9-1/4″ x 10″ (23.5cm x 25.4cm)
• Spray adhesive: repsositionable
• Contact paper: clear
• Tape: blue painter’s
• Dowels: 1/8″ (3mm) dia.
• Pre-stain treatment
• Stain of choice
Tools:
• Band saw with blades: 1/4″ (6mm), 3/4″ (19mm)
• Scroll saw with blades: #5 reverse-tooth, such as Flying Dutchman Ultra Reverse
• Drill press with bits: assorted
• Clamps
• Disc sander
• Oscillating spindle sander
• Carving tools (optional)
CLICK HERE to download the Fish-Shaped Puzzle Box Pattern.
About the Author
Bill presently resides in Florida. He enjoys finding new things in life to learn about & doing things he’s never done before. He is new to woodworking and thanks those individuals near and afar that have taught & inspired him. You know who you are!
 For scroll saw-friendly instructions to make the fish box and more great projects, CLICK HERE to purchase Scroll Saw Woodworking & Crafts Summer 2018, Issue 71.
CLICK HERE to see more great projects from Scroll Saw Woodworking & Crafts Summer 2018, Issue 71.
For more fun scroll saw projects, subscribe to Scroll Saw Woodworking & Crafts magazine. To receive patterns, articles, and updates in your e-mail inbox, subscribe to our FREE newsletter.
 For more on using a band saw, see the New Complete Guide to Band Saws by Mark Duginske. Available for $19.99 plus S&H from www.FoxChapelPublishing.com.