 Make an Ornament in a Morning
Add a little German crafts-manship to your holiday traditions with this ornament from Volker Arnold. Volker is a marvelous German artist who has developed a wide range of ornament patterns and 3D scenes for scrollers.
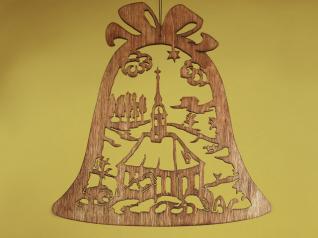
I’ve chosen a pattern from Volker’s Church Bells pattern series, but he has developed several other series of patterns as well. Use this patterns to make Christmas tree ornaments, wall hangings, window hangings or anything else to help you celebrate the holidays.
Step 1: Select and prepare your wood for cutting. If you are using a good quality Baltic Birch, lightly sand it with a sanding block, random orbit sander or palm sander using 220-grit sandpaper. If you are using hardwood, plane the top and bottom smooth (unless it came that way), then use three grits to get it very smooth—150, 180 and 200-grit sandpaper. I find that when I cut projects with intricate details, dark woods (or dark stains) tend to make the details hard to see. For this reason I recommend light-colored woods or material. Volker typically cuts his from thin plywood and doesn’t apply any finish. If you do use dark materials, a white or light-colored backer will help to make the details stand out more.
Step 2: Adhere the pattern to the wood using temporary bond spray adhesive. Be sure to spray the pattern and not the wood.
Step 3: Drill the blade entry holes with a 1/16″ bit.
Step 4: Start with the interior cuts and veining. (See TIP box for veining advice.) Then make all of the exterior cuts.
Step 5: Remove the pattern and use sandpaper to remove any fuzz. A good investment for any scroller is a set of small needle files. They usually come in sets of six and in various shapes, making it easy to sand almost any interior cut. I mostly use the round and half round files to remove fuzz or to smooth off the little pimples left by sawing.
Step 6: Finish as desired.
Tips:
Oh, The Project Possibilities
Make them smaller
- If you want to make a group of the same pattern—maybe to sell or to give as gifts–you can make small ornaments, perhaps 21/2″ high, and stack cut as many as 10 or 15 at a time from 1/16″ or 1/32″ Baltic birch plywood. Use a 1/32″ drill bit to accommodate the smaller ornaments.
- If you want to stay with a thickness of 1/8″ and stack cut, try a #2 blade.
Make them larger
- Consider enlarging the patterns and cutting them from thicker Baltic birch plywood or from 1/4″ thick hardwoods. If you enlarge the patterns to 12 or more inches high and cut them in 1/4″ or 3/8″ Baltic birch, the result can be hung on a wall, mounted on a backer in a frame, or hung in a window. Hanging ornaments in the window is a traditional German practice.
- If you are only cutting one 1/4″ piece, try a #2 blade. For stack cutting three at a time, use a #5 blade.
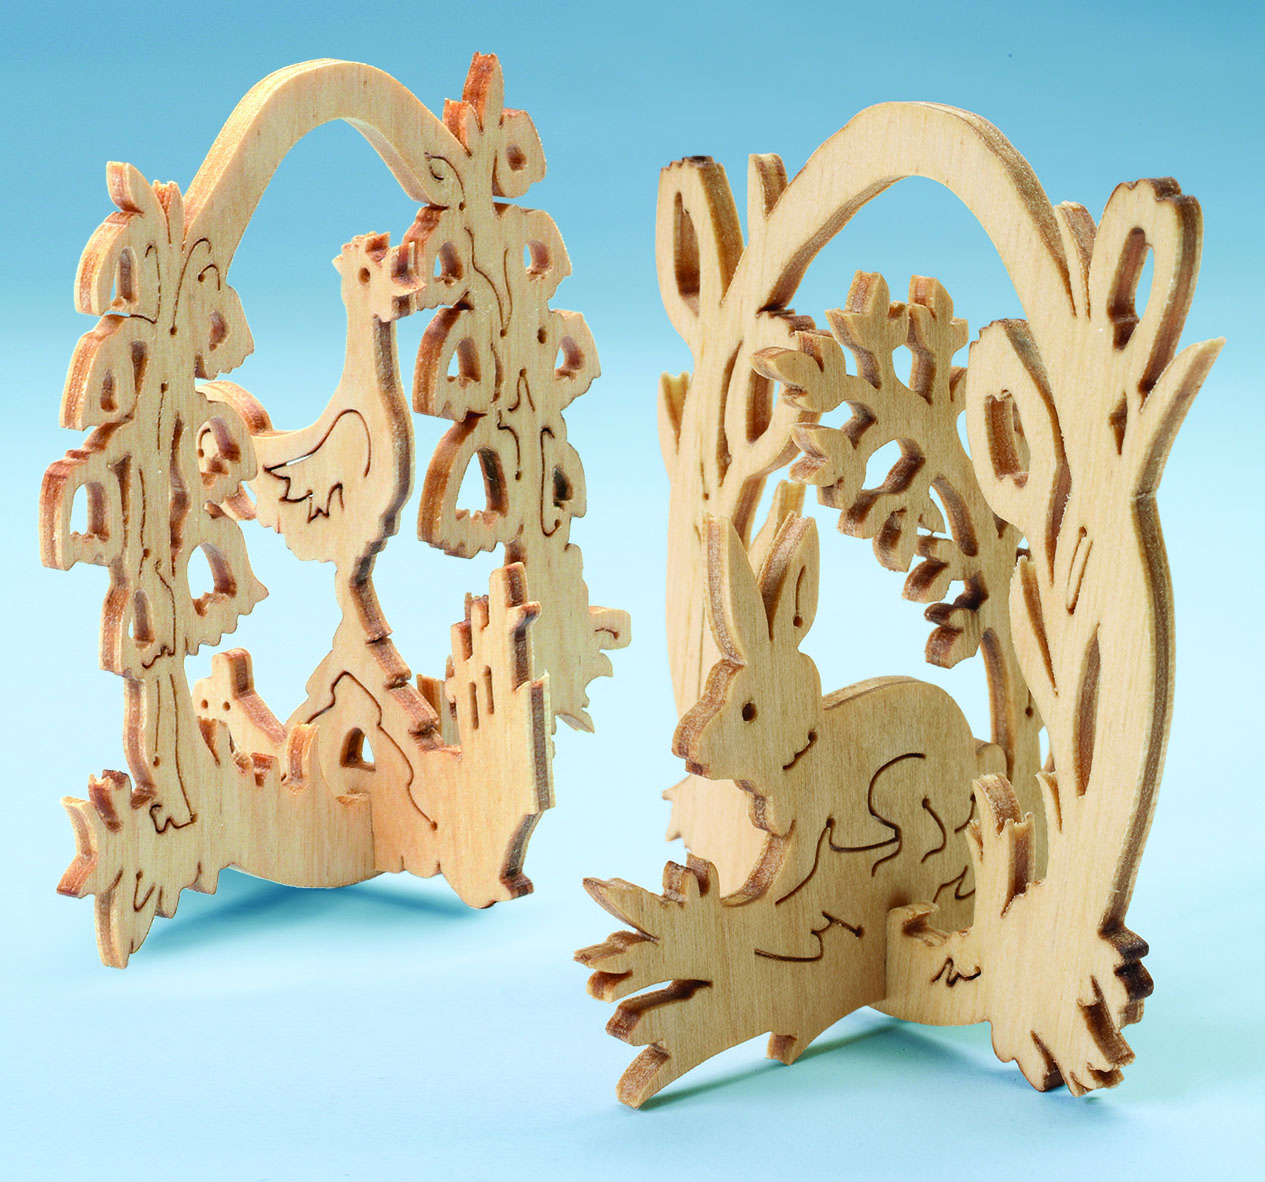
Make them just right
- For tabletop decorations, put a small tab on the bottom of the ornament (about 1/2″ wide and 1/4″ long) that will fit into a slot in a base.
- Transparent suction cups with hooks, available from a local craft store for about 20 cents a piece, work well for hanging lightweight decorations in the window.
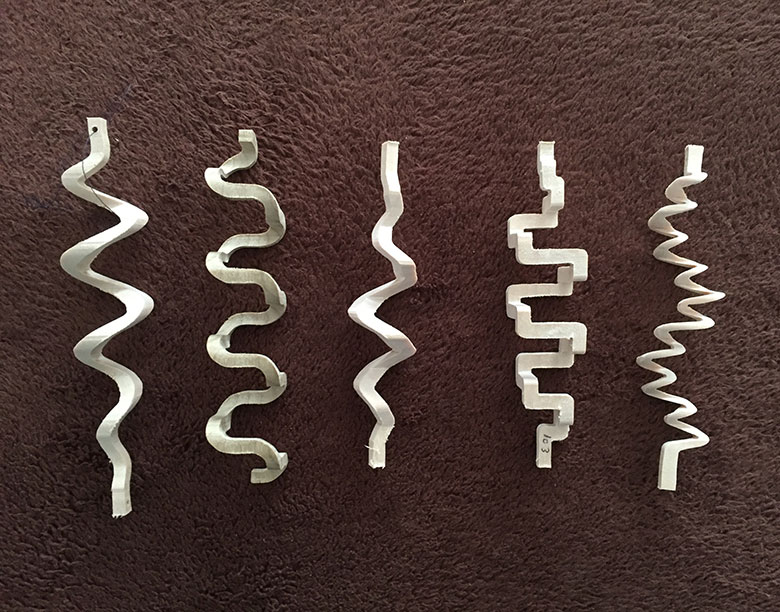
- Cut the patterns in 1/2″ Corian, thin aluminum or Plexiglas of various colors and thicknesses.
- Cut the ornaments in aluminum or 1/8″ Baltic birch, then spray paint them with a glossy black enamel. Placing the black ornament on a light background makes for a very nice display.
- Experiment and create your own holiday projects.
Many patterns, including the one shown here, have veins, or detail lines. Very often, cutting these detail lines with a regular blade doesn’t make them stand out because the cut, or kerf, is so thin. To make the detail lines stand out more, cut the detail lines first with a regular reverse tooth blade (the same one I use on the rest of the project). Then cut them again with a small #1 spiral blade. While I find that it is difficult to follow a pattern line with a spiral blade, if you cut with a regular blade first, the spiral blade will follow the narrow cuts very accurately. Since spiral blades do leave quite a bit of fuzz on the wood, lightly sand the top and bottom of the wood with 220-grit sandpaper to remove the fuzz. Use a very small file for extra clean up. You may also want to try the Flying Dutchman spiral blades now available with reverse teeth.
Materials:
|
Tools:
|
Special Sources
For information on other Volker ornaments and patterns, contact Tom Sevy at tsevy99@gmail.com . Tom’s Wasatch Woodcrafts is the North American Distributor for Volker Arnold Patterns and for Tom’s own original patterns. He hopes to have a website up and running by the time this article is published.
To try Flying Dutchman spiral blades, contact Mike’s Workshop, Inc., 400 Lakota Ave., P.O. Box 107, Brandon, SD 57005, 605–582–6732, www.mikesworkshop.com, mike@mikesworkshop.com.
Attachments
Bell Ornament Pattern