Creative photo frame adds a nautical feel to any room
By Keith Robinson
A seafaring friend asked me to make a sign for his newly built outside bar. After scanning the internet for an appropriate nautical theme I chose a brass Victorian style porthole. This was the first step to making a model in plywood with a metallic finish, then adding a seascape and text to personalize it.
Selecting the Materials
If you plan to display the porthole outdoors, choose exterior grade wood and paint. If you plan to display it inside, you can make it from whatever material you choose. Use plywood for the smaller parts (for strength), but you could use whatever wood you want for the larger pieces. I use clear acrylic plastic for the window glass. It can be cut with a scroll saw, but I suggest covering the plastic with blue painter’s tape to lubricate the blade. If the blade gets too hot while cutting, it can weld the plastic back together. When drilling acrylic, add a drop of lubricant to keep it from cracking.
Getting Started
Cover the pieced with blue painter’s tape and attach the patterns to the tape.
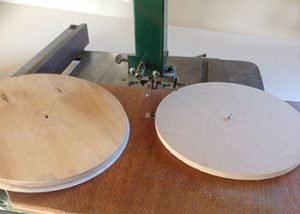 |
1: Cut the perimeter of the base and frame. I use a band saw with a simple circle cutting jig, but it can be cut with a scroll saw. Then, drill a blade-entry hole and cut the inside of the frame. Use the inner dotted line on the frame pattern to cut the clear acrylic plastic for the window. Leave the protective film on the acrylic plastic until the final assembly. |
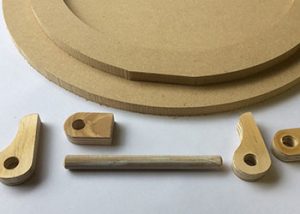 |
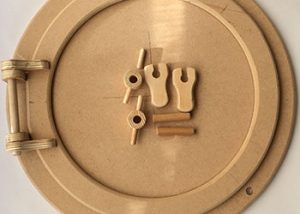
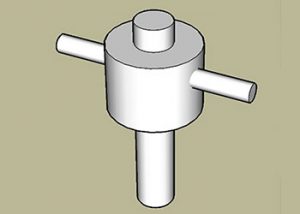
2: Drill the indicated holes and cut the hinge uprights. Then, drill the required holes and cut the hinge arms and the locking tabs. Cut the locking tab dowels to length, and drill as indicated on the pattern. Cut the locking pin centers, the hinge pin, and locking nut toggles to the length listed in the materials list. |
 |
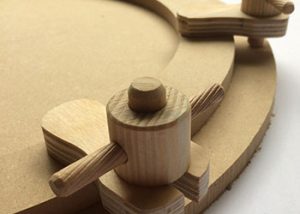
3: Sand the hinge uprights and hinge arms. Dry-assemble the hinge uprights, hinge pin, and hinge arms. Check the fit and mark the position. |
 |
4: Sand everything else. Round the edges of the small pieces with sandpaper. Dry assemble the frame, locking tab assemblies, and hinge assemblies to check the fit. |
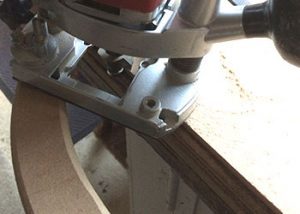 |
5: Round the sharp corners. Use a router with a roundover bit to round the outer edges of the base and frame. Then, use the router to cut the rabbet for the acrylic plastic on the inside of the frame. |
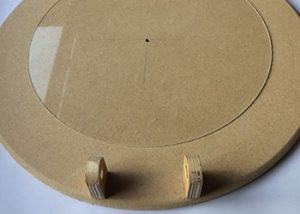 |
6: Glue and screw the hinge uprights to the base. Drill 1/16″ (2mm)-diameter pilot holes and use two #8 x 1-3/16″ (30mm)-long wood screws to attach the hinge uprights to the base. |
 |
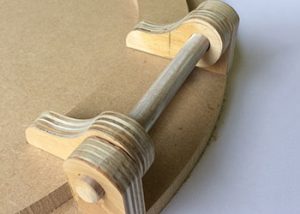
7: Center the frame on the base. Insert the hinge pin through the uprights and put the hinge arms on each end. Position the arm on the frame, and glue and pin nail them in place. Make sure you don’t drive the pins into the base. |
 |
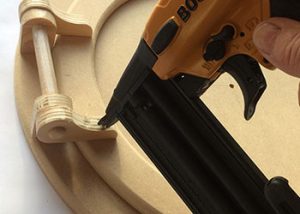
8: Glue and pin nail the locking assemblies together. Insert them through the locking tabs into the holes in the base. |
 |
9: Glue and pin nail the locking tabs to the frame. Do not nail through the frame into the base. Glue the locking tabs to the locking tabs, but do not glue them into the holes in the base. They help hold the frame in place, but must come out to change the photo. |
Finishing the porthole
I made my porthole from plywood and MDF, so I spray painted it with a few coats of metallic brass paint. If you use an attractive hardwood, you could apply an oil finish. To give the look of rivets, I trimmed the ends of 3/4″ (1.9cm)-diameter brass upholstery tacks and drove them into the base where indicated on the pattern. After adding the tacks, secure the acrylic plastic in the frame with hot-melt glue. Attach your photo of choice to the base. Drill pilot holes from the back of the base into the frame and use two #8 x 3/4″ (1.9cm)-long wood screws to hold the frame closed. Attach two D-ring hangers to the back of the base.
Materials & Tools
Materials:
- Wood, 1/2″ (1.3cm) thick: base, 18″ (46cm) square; frame, 15-1/2″ (39.5cm) square
- Plywood, 1/2″ (1.3cm) thick: hinge parts and locking tab parts, assorted scraps
- Acrylic plastic, 3/16″ (5mm) thick clear: 13-1/4″ (33.5cm) square
- Dowel, 5/16″ (8mm) dia.: locking pin toggles, 4 each 1-1/2″ (3.8cm) long
- Dowel, 1/2″ (1.3cm) dia.: hinge pin, 5-3/4″ (14.4cm) long; locking pin centers, 2 each, 2-3/4″ (7cm) long
- Dowel, 1-1/8″ (2.8cm) dia.: locking pin body, 2 each 1″ (2.5cm) long
- Brass upholstery tacks: 10 each 3/4″ (1.9cm) dia.
- Spray adhesive
- Tape: blue painter’s
- Wood glue
- Wood screws: 4 each, #8 x 1-3/16″ (3cm) long; 2 each #8 x 3/4″ (1.9cm) long
- D-ring hangers: 2 each
- Finish: brass metallic spray or clear oil finish
Tools:
- Band saw (optional)
- Scroll saw
- Drill with bits: assorted
- Sanders of choice
- Pin nailer
- Clamps
- Router with bits: rabbet, roundover
- Hammer
- Diagonal cutters (to trim upholstery pins)
CLICK HERE to download the pattern for the Porthole Picture Frame.
About the Author
Keith Robinson has always been a keen DIYer and now that he is retired, he can fully concentrate on his interests. From his workshop in East Yorkshire, England, he works on a variety of projects.

For more great projects, CLICK HERE to purchase Scroll Saw Woodworking & Crafts Summer 2018, Issue 71.
CLICK HERE to see more great projects from Scroll Saw Woodworking & Crafts Summer 2018, Issue 71.
For more fun scroll saw projects, subscribe to Scroll Saw Woodworking & Crafts magazine. To receive patterns, articles, and updates in your e-mail inbox, subscribe to our FREE newsletter.
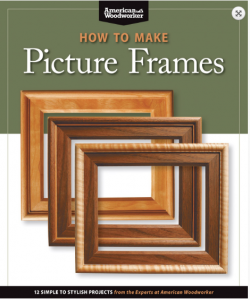 For more on making frames see How to Make Picture Frames. Available for $19.95 plus S&H from www.FoxChapelPublishing.com.