Drill at any angle without moving your drill press table
By Tony Giroux
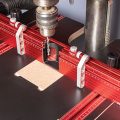
I have an adjustable table on my drill press that I use to drill at angles when I’m making inlays, a stacked bowl, or some boxes. However, it’s always a challenge to reset the table to horizontal after I rotate it. I designed this jig to allow me to drill at an angle without changing the drill press table.
Making the Jig
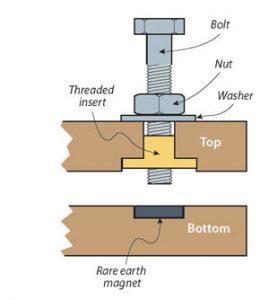 |
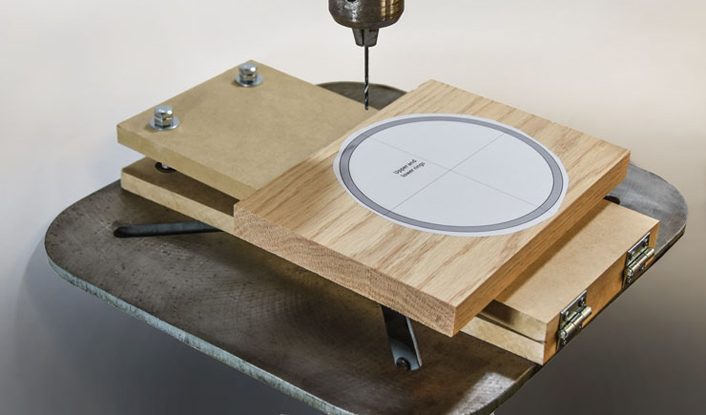
Cut the plywood or MDF to size. The boards must be flat and the ends must be parallel. Drill the holes as indicated in the templates on page 14. Glue rare earth magnets into the holes in the bottom board, and install threaded inserts into the under side of the top board. Make sure the boards sit flush against each other. Then, refer to the drawing and install the bolts, nuts, and washers from the top side of the top board. Do not tighten the nuts against the board. Finally, install the hinges across the ends opposite the other hardware. |
Using the Jig
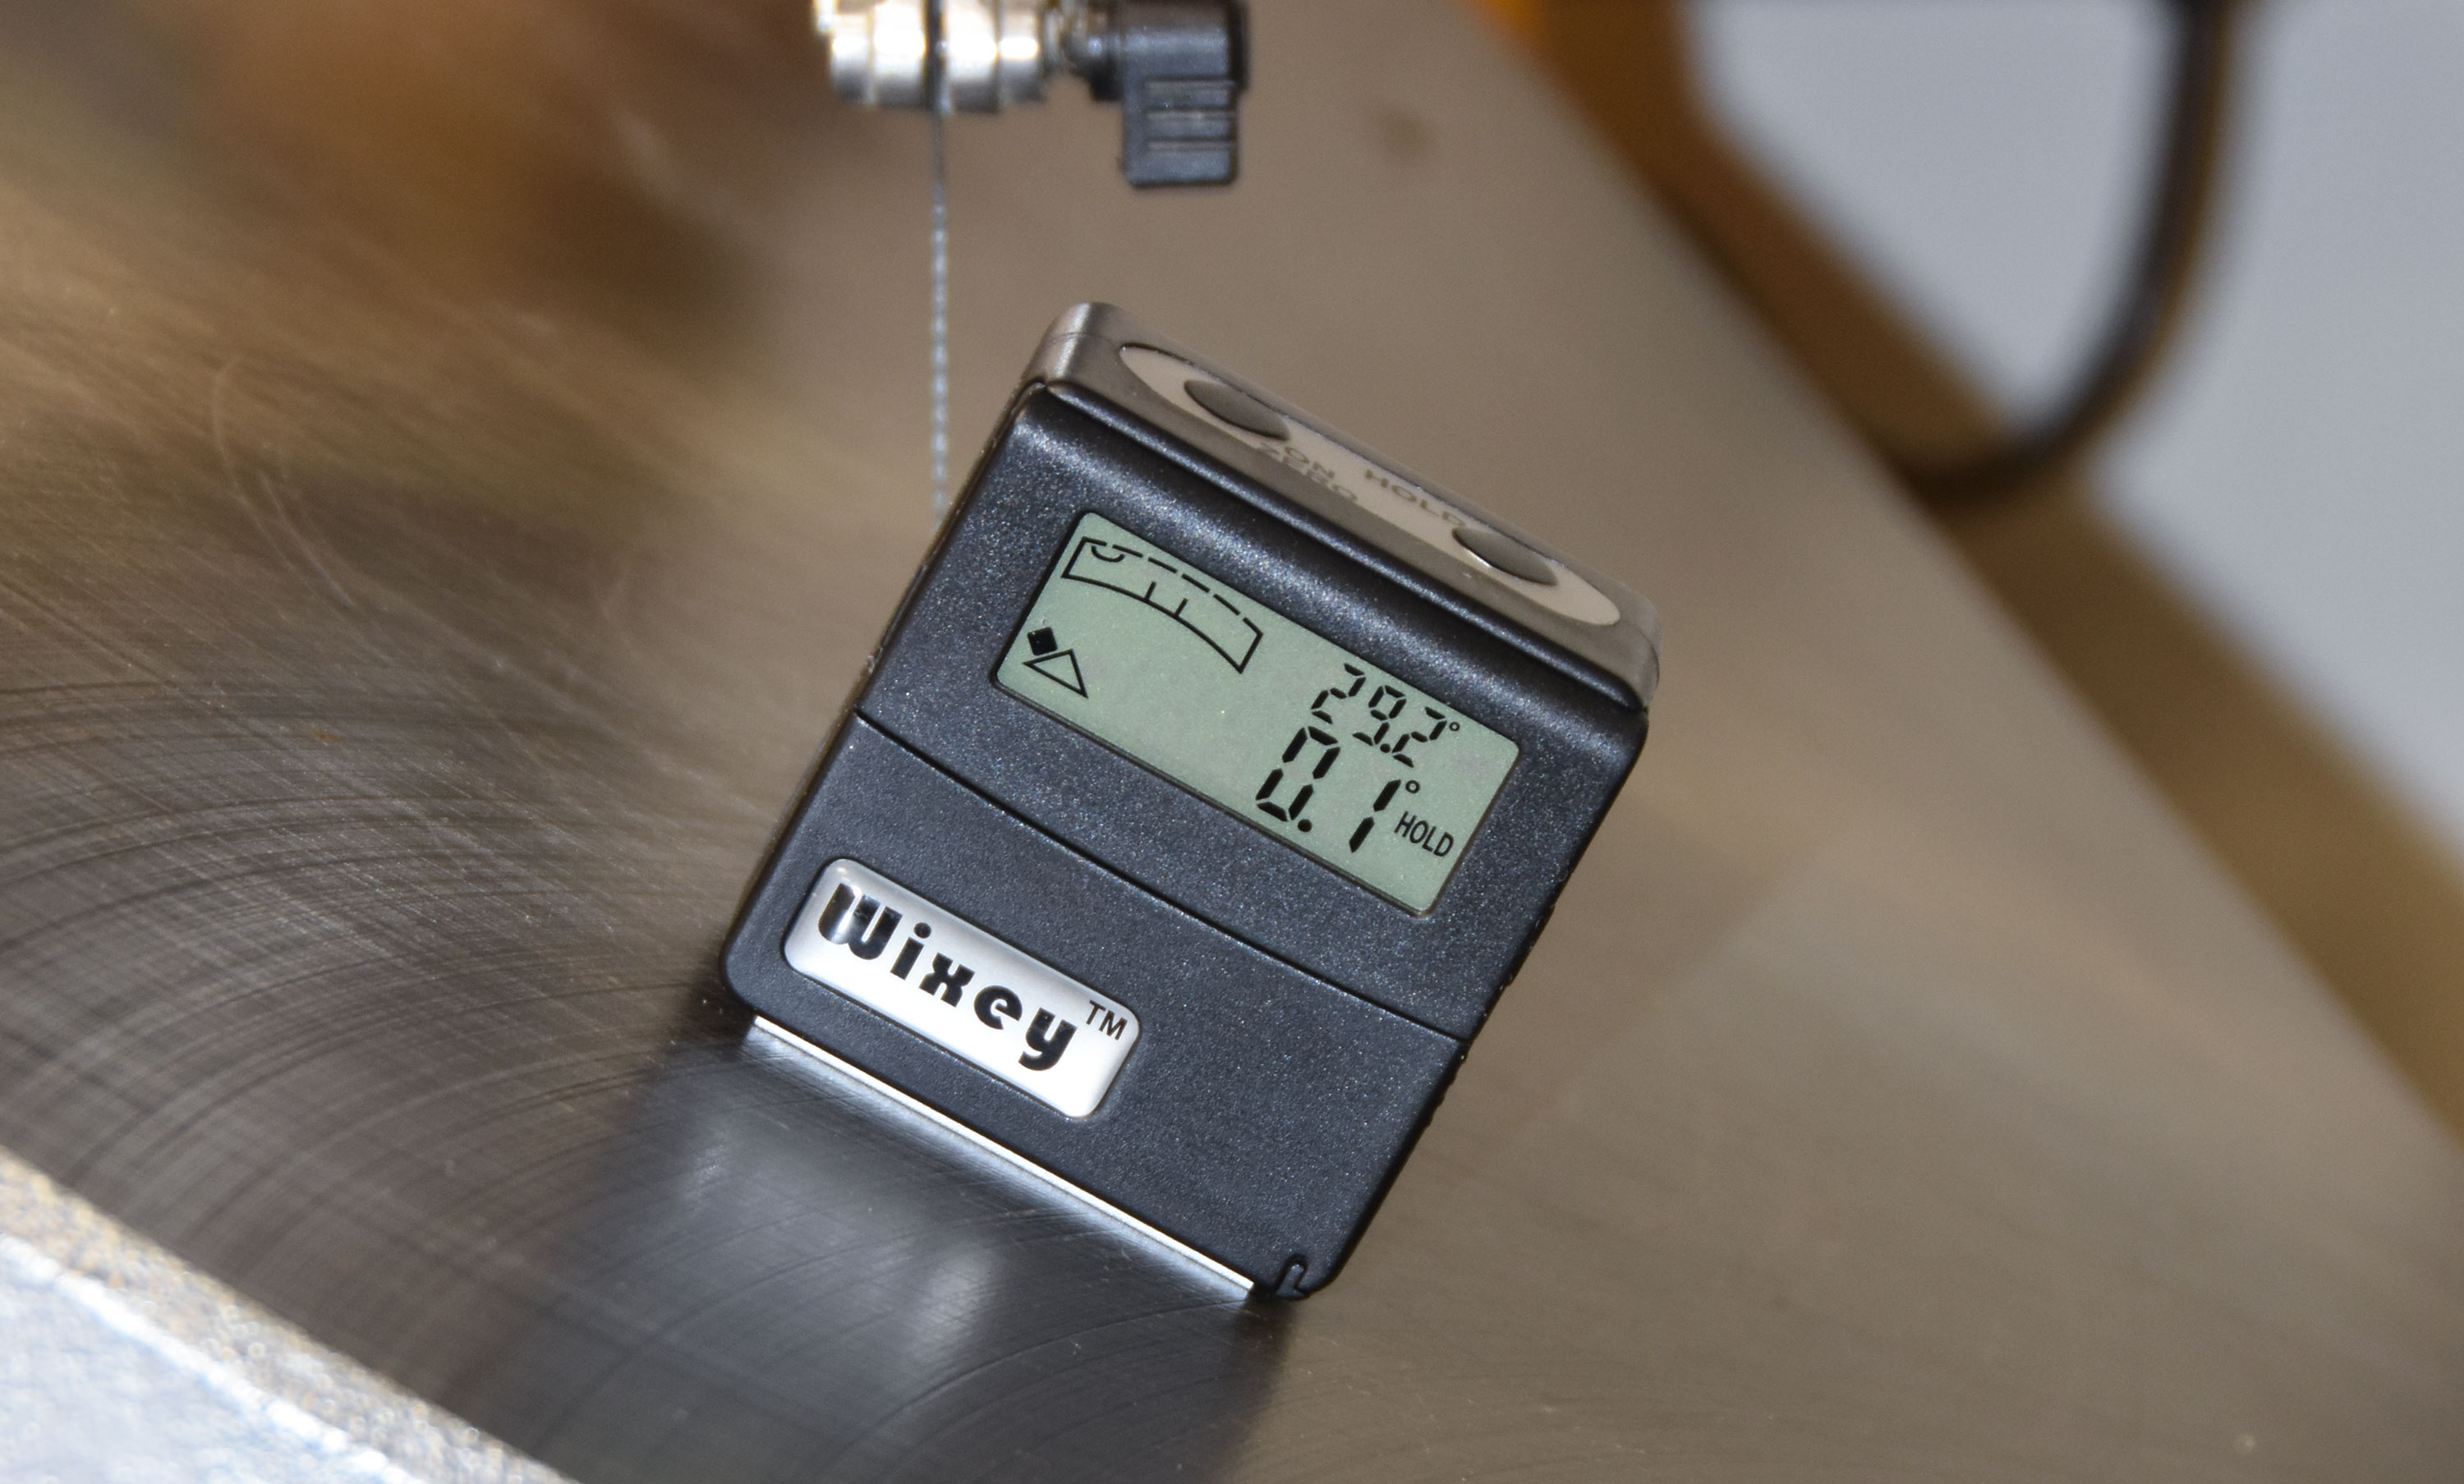
There are a couple of ways to set the angle of the board. For both methods, start with a closed jig and a horizontal (flat) drill table. Note: To drill at higher angles, you may need longer bolts.
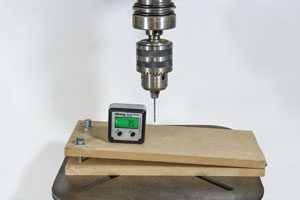 |
Zero a digital angle guide on the closed jig on the drill press table. Slowly rotate the back bolt to tilt the jig until the angle guide reaches the desired setting. Screw the front bolt in until it just touches the magnet, and then finger-tighten the nuts down against the top board to lock the angle.
 |
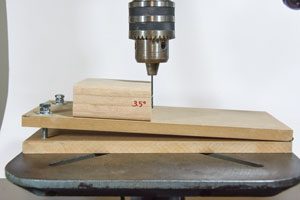 |
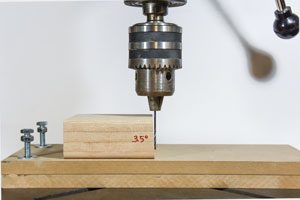
Use a scroll saw to cut the ends of several pieces of scrap at common angles; mark each block with its angle. Place the closed jig on the table and hold it in place with a fence or two pieces of double-sided tape. Place an angled block on the jig near the drill bit. Slowly rotate the back bolt to tilt the jig until the drill bit is parallel with the angled block. Screw the front bolt in until it just touches the magnet, and then finger-tighten the nuts down against the top board.
Materials & Tools
Materials:
- Plywood or MDF, 1/2″ (1.3cm) thick: 2 each 5″ x 12″ (12.7cm x 30.5cm)
- Rare earth magnets, 1/8″ (3mm) thick: 2 each 1/2″ (1.3cm) dia.
- Cyanoacrylate (CA) glue
- Hex bolts with washers and nuts, 1/4″-20: 2 each 1 1/2″ (3.8cm) long
- Threaded inserts, 1/4″-20: 2 each
- Hinges with screws: 2 each 1″ (2.5cm) long
Tools:
- Saw
- Drill press and bits: 3/4″, 1/2″ Forstner; 5/16″ twist
- Hand drill and bit to fit hinge screws
- Screwdriver
- Hammer
CLICK HERE to download the patterns to make your own Angled Drilling Jig.

CLICK HERE for more great articles from Scroll Saw Woodworking & Crafts Spring 2018 (Issue 70).
For more fun scroll saw projects, subscribe to Scroll Saw Woodworking & Crafts magazine. To receive patterns, articles, and updates in your e-mail inbox, subscribe to our FREE newsletter.
 Want more shop-made jigs and fixtures? Look for Workshop Projects, available for $19.95 from www.FoxChapelPublishing.com.