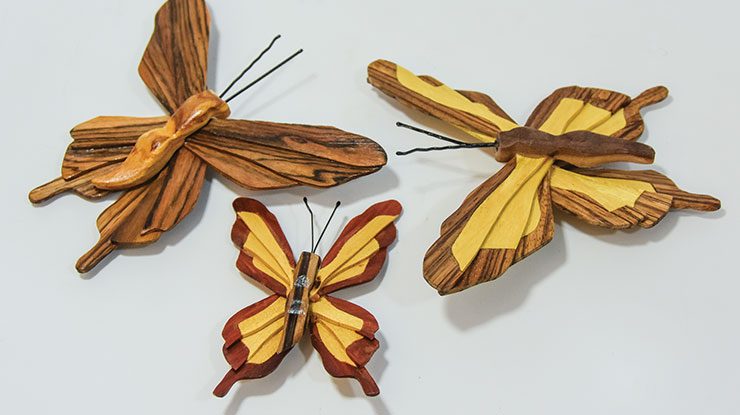
Transform hardwood scraps into snappy spring decorations
By Gene Starkey
Like most scroll sawyers, I have accumulated a variety of small pieces of colorful hardwoods. These patterns allow wood scraps to undergo a metamorphosis, like a caterpillar, and transform into beautiful butterflies.
I’ve created patterns for basic wing pieces that can be cut from one wood if you cut along just the outside lines. I demonstrate how to make the wing piece from two kinds of wood by stacking together two colors of wood and cutting along all of the lines. Increase or decrease the size of the patterns to use up scrap wood of any size or shape. Then, let your mind be free and explore your imagination as you create your own patterns. While my basic design uses six wing pieces on each side, you can experiment with adding more pieces (12 pieces makes a substantial butterfly).
Materials:
• Hardwood scraps 1/8″ (3mm) thick, such as satinwood and cocobolo
• Walnut, 1″ (2.5cm) square: 3″ (7.6cm) long
• Scrap wood, 1/2″ (1.3cm) thick: wing gluing jig, 7″ x 12″ (17.8cm x 30.5cm)
• Packaging tape, clear
• Glue stick, such as Elmer’s School
• Wood glue
• Epoxy: five-minute
• Bobby pin: antenna, 4″ (10.2cm) long
• Rare earth magnet: 1/4″ (6mm) dia.
• Toothpicks, round
Tools:
• Scroll saw blades: #4 reverse-tooth
• Drill press with bit: 3/32″ (2.5mm)-dia. brad point
• Sanders: belt, pneumatic drum
• Spring clamps
Special Sources:
Rare earth magnets, part number d125b, are available from Amazing Magnets, www.amazingmagnets.com, 888-727-3327, in lots of 50 for $16.95 plus S&H.
Download the pattern here: WEB Butterfly Magnet Pattern
Making a Butterfly
| Step 1: Prepare the wood. Either purchase precut 1/8″ (2mm)-thick wood or slice the wood to the proper thickness with a table saw, band saw, or even a scroll saw. Sand off the saw marks and make sure all of the wood for the wings is the same thickness (I run them through a drum sander). |  |
| Step 2: Stack the blanks. Use clear packaging tape to make two stacks of contrasting blanks and attach the 12 wing patterns to the blanks using a glue stick. Cover the patterns with another layer of clear packaging tape. | 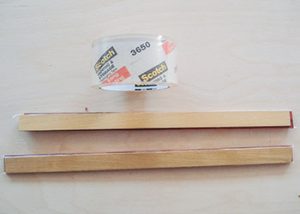 |
| Step 3: Drill the holes marked on the patterns for all 12 wing pieces. Use a 3/32″ (2.5mm)-diameter brad-point bit. | 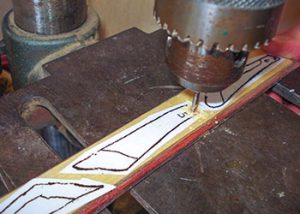 |
| Step 4: Cut the wings using a #4 reverse-tooth blade. I sort the cut wing pieces into a multi-compartment container to keep things organized. | 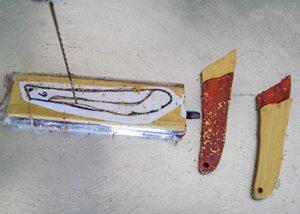 |
| Step 5: Glue together the wing segments. Secure them with spring clamps and allow the wood glue to dry. Sand the wings smooth; I use a pneumatic drum sander. | 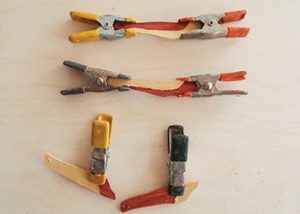 |
| Step 6: Make a gluing jig for the wings. On the jig blank, drill two 3/32″ (2.5mm)-diameter holes 4″ (10.2cm) apart. Put a toothpick in each hole. | 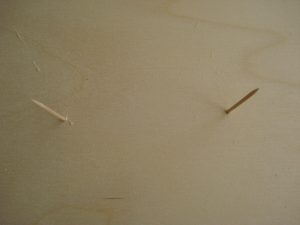 |
| Step 7: Stack the wing pieces on the toothpicks. Start with piece 1. Apply wood glue to the area around the toothpick on the top of part 1 and add wing part 2, rotating part 2 a bit to expose a portion of part 1. Repeat with wing part 3. Add part 4, but rotate it to make a visible space between parts 3 and 4. Add parts 5 and 6, exposing a bit of the part. Clamp the parts in place. | 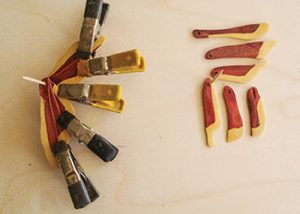 |
| Step 8: Drill 1/8″ (3mm)-diameter holes in the tips of two large spring clamps. Lift the toothpick off the board, clip off the ends, and feed them through the holes in the spring clamps. Adjust the position of the wing parts and clamps as needed. Let the glue dry. | 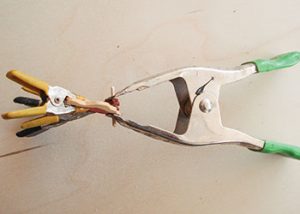 |
| Step 9: Attach the compound-cut pattern to the body. Cut along the lines. | 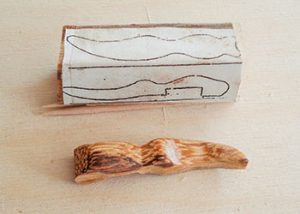 |
| Step 10: Add the antennae. Drill two 3/32″ (2.5mm)-diameter holes side by side in the top of the body and remove any wood between the holes. Use five-minute epoxy to give a bobby pin into the holes. Sand the body. | 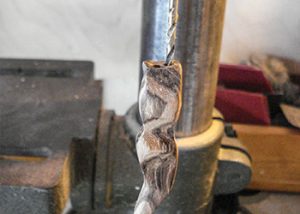 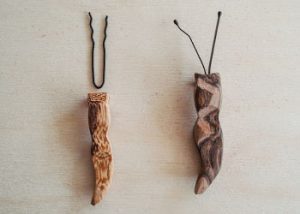 |
| Step 11: Sand the ends of the wings where the two halves meet. | 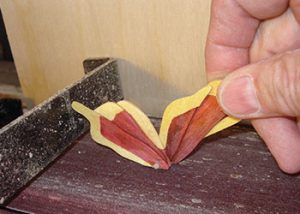 |
| Step 12: Complete the butterfly. Glue the two halves together and secure them with a spring clamp. Allow the glue to dry. Then, glue the body to the wings and epoxy a magnet to the back of the wings. Apply clear matte spray finish. | 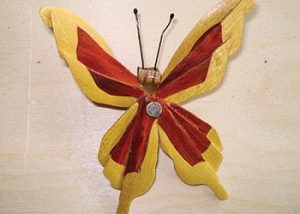 |
 Gene Starkey of Lake Havasu City, Ariz., has been building intarsia since 2003. This butterfly presentation is dedicated to Don Claar, his mentor, who taught the design basics to Gene. Don lost his battle with cancer on November 16, 2016. Don was a master intarsia designer and artist.
 For more great projects like this, check out Scroll Saw Woodworking & Crafts magazine.