Add texture to your projects with an inexpensive rotary tool
by Bob Duncan
This article was first published in issue 50 of Scroll Saw Woodworking & Crafts.
With a simple rotary tool, like a Dremel, and some basic bits, you can add details, dimension, and shaping to your scrolled projects.
Inexpensive rotary tools and bits are available at most hardware and home improvement stores. There are many bits to choose from, but I suggest starting with just four. Once you learn the basics of power carving, you can experiment with different bits to get different effects.
Choosing a Rotary Tool
Rotary tools range from low torque, high speed tools, to powerful motors hooked to flexible shafts, to high-speed grinders that are similar to dental drills. A low-torque tool, like a Dremel, and basic bits cost less than $100 and can be found in home-improvement stores. The more powerful machines cost $150 and up for just the tool and are usually only available at woodworking stores or by mail/online order.
Cordless and corded tools are available. I think the corded tools are easier to maneuver because they tend to be smaller (the battery pack adds length to cordless tools), but you do need to deal with the cord.
Any tool you buy will work. The more powerful the tool, the more expensive it is. For basic shaping (such as the work on the log book), you don’t need a lot of power or torque. To rough out intarsia pieces in a reasonable amount of time, however, you need a more powerful tool.
Once you get the feel for power carving, you may decide to upgrade your equipment. But if you’re a scroller at heart and just want to add some texture and shaping to your pieces, you don’t need expensive tools.
Choosing Bits
I suggest that beginners buy four bits: sanding drums in two sizes and cone-shaped and flame-shaped high-speed steel cutters. You can carve and shape most projects with just these bits.
Sanding Drums: Sanding drums are the workhorses for beginning carvers. You can choose the speed of the wood removal based on the grit of the sanding band. Choose a coarse-grit drum for fast wood removal and a finer-grit band for slower wood removal and a smoother surface. The 1/2″ (13mm)-diameter drum is good for most work, but you may need to switch to a 1/4″ (6mm)-diameter drum for small areas. Use the corner of the drum to get into tight crevices and the middle of the drum for open areas.
High-Speed Steel Cutters: High-speed steel cutters actually cut (carve) rather than sand. They can be more difficult to control than sanders, but they allow you to carve textures and fit into the tightest spots.
The cone-shaped bit has the sharpest point and fits into the tightest areas but, due to the shape of the cone, it doesn’t carve curved shapes into flat surfaces well. The flame-shaped bit has a point that fits into most areas, but also has rounded sides that allow you to carve curved shapes into flat surfaces.
As these bits get dull, they start to burn the wood. The bits are inexpensive enough that you can buy both and then replace them rather than attempt to sharpen them. With heavy use, the bits usually last a month, but their longevity depends on how you use them and the density of the wood you’re carving.
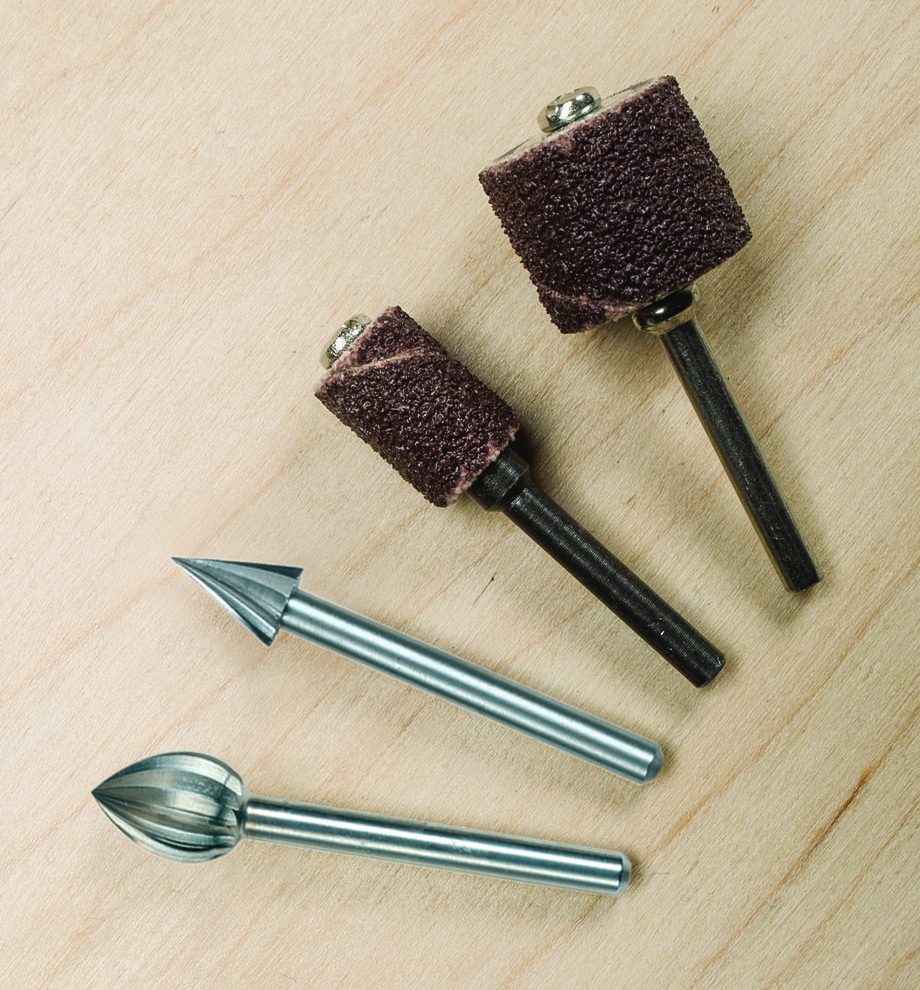
Although many bits are available, flame- and cone-shaped high-speed steel cutters and two sizes of sanding drums will give you the capabilities to get started.
Power Carving Techniques
It is simple to get started with power carving. Low-torque tools depend on the speed of the tool to do the work, so it’s best to use a light touch. Press the tool to the wood lightly but firmly, and then lift it off when you hear the motor slow down. As you use the tool, you’ll get a feel for how hard to press and when to lift.
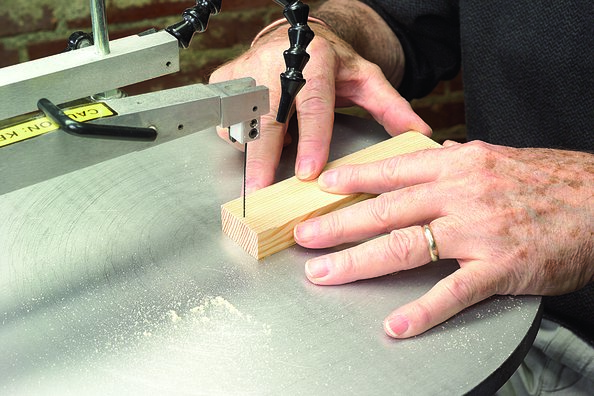
I generally hold my power-carving projects while I work. If the piece I’m shaping is small, I use double-sided tape to attach it to a larger piece of scrap to make it easier to hold. Use caution when carving because the tool can hit an area where the wood density changes abruptly, causing the tool to skip toward your holding hand. You won’t get a serious injury if the tool brushes a knuckle, but it will sting. If you prefer, clamp the project and use both hands on the tool, which makes it impossible to hit your fingers with a bit.
Most of the basic tools available today are variable speed, but I seldom turn the speed down below the half-way mark. To remove wood quickly, use a high speed. As you begin to carve the details, slow the tool slightly to give yourself better control.
Unlike carving with edged tools, the grain direction really doesn’t matter in power carving. I’ve had a high-speed bit tear out a little when I went against the grain, but I’ve never had a problem with a sanding drum. You can sand across the grain, but I usually try to sand with the grain to speed up finishing later. Cross-grain scratches show up when you apply
a finish.
Finally, remember that power carving makes saw dust just like scrolling does. Use a dust collector and wear a mask while you work.
Discuss this material on the Scroll Saw Woodworking & Crafts forums.