

 Delight Your Child or Grandchild on Christmas Day
Pattern designed by John A. Nelson
Walking through a mall around Christmastime can be jarring to the senses. Store windows are ablaze in flashing lights. Beeping and binging fill the air as electronic boutiques tout their latest video games. Kids tug at parents’ sleeves, begging for yet another video game to add to their collection.
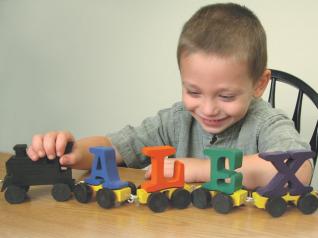
If you’re at all like me, I steer clear of that hoopla. The gifts I like to give and I know children still like to receive are made from wood, like this fun pull toy, the Alphabet Train. Designed by my longtime friend John A. Nelson, it is just the type of project I prefer. It’s easy to make and is made from pine, so it’s not expensive. And it was all cut with my favorite tool, a scroll saw.

Step 1: Select your wood, making sure it is knot-free. Cut it to size, 31/2″ x 4″ per train piece. Now cut the spacers and the wheels to size using a jig similar to the one seen in the photo.
Step 2: Photocopy your pattern, keeping the original for future use. Spray the pattern—and not the wood—with temporary bond spray adhesive. (See TIP box below to learn a “neat” way to apply the adhesive.) Apply the patterns to cut wood pieces.

Step 3: Drill blade entry holes using the 1/8″-diameter bit for interior cuts. Continuing with the drill, change the bit to the 9/32″-diameter bit and make the holes for the axels to move freely. Keep that bit in place and drill the holes in the spacers. Change to 1/4″-diameter bit for the wheels only. I encourage you to use a jig again to secure the round spacers and wheels in place as you drill.
Step 4: Thread a #5 reverse tooth blade through the entry hole and begin cutting your interior cuts. Continue making all interior cuts, then cut the outsides of the shapes.
Step 5: Sand all cut parts, including wheels and spacers. I find that 220-grit sandpaper works best. Remove sanding dust with either an air hose or a wipe cloth to ensure a smooth surface for painting.
Step 6: Paint your train, making sure you use a non-toxic paint. Acrylics work great and they are kid safe. Spray with a matte finish to give it a professional look.
Step 7: Now it’s time to make the couplings for the train using an awl and eye screws. The awl is used in two ways. First use it to make an indentation for centering the eyescrew. (Pine is soft enough that you just hand screw the eyescrew into the wood.) You can also use the awl to pry open the eye to make the hooks to allow the train cars to connect. Don’t forget to put an eyescrew on the front of the engine to make it a pull toy.
Tip: Alternatives to Buying Wheels
Instead of purchasing wheels, you can make them from 1″-diameter dowels.
Cheap-o Spray Box

Using spray adhesive can be messy. The trick is to contain the overspray. I’ve found that an old 12″ x 15″ cardboard box works great. Hold the pattern inside the box to spray it.
Materials
|
Tools
|
Attachments
Alphabet Train Pattern
Car Assembly Drawing


